Showing posts with label Easy Crafts. Show all posts

5.26.2011

I'm back!!!

Well I had something come up that I really was not expecting...morning sickness, and it hit hard and long. Unfortunately I was just starting a huge {it probably seems bigger than it was because of the morning sickness} project for a friend. I didn't want to get out of bed or even eat because I knew how it was all going to end anyways.

Well I'm doing better now and I have finished her project {pictures to come} and am finally feeling up to creating projects again, especially ones for our little one coming in October.

To start off I want to share one of the simple projects I did. It is just a bracelet and earring set made with the birthstones of my husband, the baby in October and me. It was even easier to do because the 'pearl' beads came already assembled in a chain. I got the other two birthstones and attached them in between. Very simple but I love the way it turned out. Kind of like those big chunky cluster bracelets women are wearing these days but without having to be big and chunky.

10.14.2010

Personal Notepad

I created some simple order forms to take with me when I go to the HOPE Festival on Oct. 27th. To help keep everything together I wanted to put it all together in a notepad but I didn't want to pay for something so simple that I was sure I could do myself. So here it is - so simple and would be a fun craft to do with your kids {my niece and nephew}.

You'll need: paper, stamp and ink set, cutter of some sort, glue and some REALLY heavy books.


First you will need to create you design. I used a computer program since I was making order forms but this would be great to use stamps. Just get your favorite set and some varying ink pads. I printed mine first and added a guideline to the first page to help me cute in the right spot. If you are using stamps it might be easier to cut your paper to the desired size for the notepad.


After you have you notepad papers cut with their designs on them you are going to line them up. Make sure the edges that you want the glue to be on {in my case the top} is lined up as straight and flat as possible. Then you'll take your heavy books and place as close to the edge to be glued. This helps keep the notepad tight and keeps the glue from seeping into the separate sheets.
*Note with my books the binding edges didn't really lay flat on my papers so I turned them so the straight edge of the cover was right up to the edge.


Next, use the sponge to add the glue to the top of the flattened notepad papers. You can use your fingers or whatever else you might have around, this was just the easiest for me. After adding the first coat let it dry and add a second coat. My layers were pretty thick so I only needed 2 layers but add more if you think it's too thin.


Tada: your own personal notepad. If you are wanting more than one pad, stack up the paper in one pile. After the glue binding is completely dry, divide your notepad and just pull apart.


If you work on this tutorial I would love to see what you came up with!!

7.21.2010

Rag Flip Flops

Girls Camp is a time when the Young Women in a ward get together, with the leaders, and do a summer camp. It has always been one of my most favorite activities. The memories from my camps when I was in Young Women's have stayed with me. I love singing around the camp fire, hiking, being in nature and the crafts/activities that our leaders had for us were always great.

This year, being camp director, my goal was to make sure that everything we give the girls will be things that they can continue to use once they are back from camp. These things will be a subtle reminder of their time at camp, the Spirit they felt there and the memories they made. We also asked the girls what things they would like to do {and would like NOT to do}. It was mentioned that they wanted to do rag flip flops.

Me, myself and I have never made them but I could not imagine that it would be too hard. I called up my cousin {she is a sewing/quilting machine} and we talked about how I could go about it.

Here it is......

Find any scrap material you have lying around or get a couple of quarter squares from your local fabric store. The scrap will need to be made into 1"x8" pieces. You will also need scissors, a ruler and a pair of flip flops.

1st Step: I took all my material and cut them into 8" lengths.


2nd Step:
Then at the top of each I cut in about a 1/2". Then I tore the fabric where I had cut it. There you have it, a huge pile of 1"x8" scraps. Each flip flop took 29 strips. Depending on the length of the straps on your own flip flops ~ you may need more or less. Make sure to tare enough strips!


3rd Step:
I went down the strap and tied all the fabric strips in double knots. I'm sure you could do a single but I felt the double knot would hold better and it made the ends just a bit shorter instead of having so much fabric hang off.


There you have it. Camp Flip Flops!!!

7.20.2010

Organize

As I am sure you have gathered, I love to create things ~ easy, hard, simple, intricate ~ whatever it is, I always find a release in creating and designing. One thing I love to do is sew, it's one of those skills that my mom made sure we knew how to do growing up that has turned into a hobby. When I was in high school I designed clothes. The past couple of years the spark for quilting has been rekindled and someone can never have too many bags. For the past couple of years I have been designing patterns for the perfect bag. I have come to find that there is no 'perfect' bag, just a perfect bag for each situation.

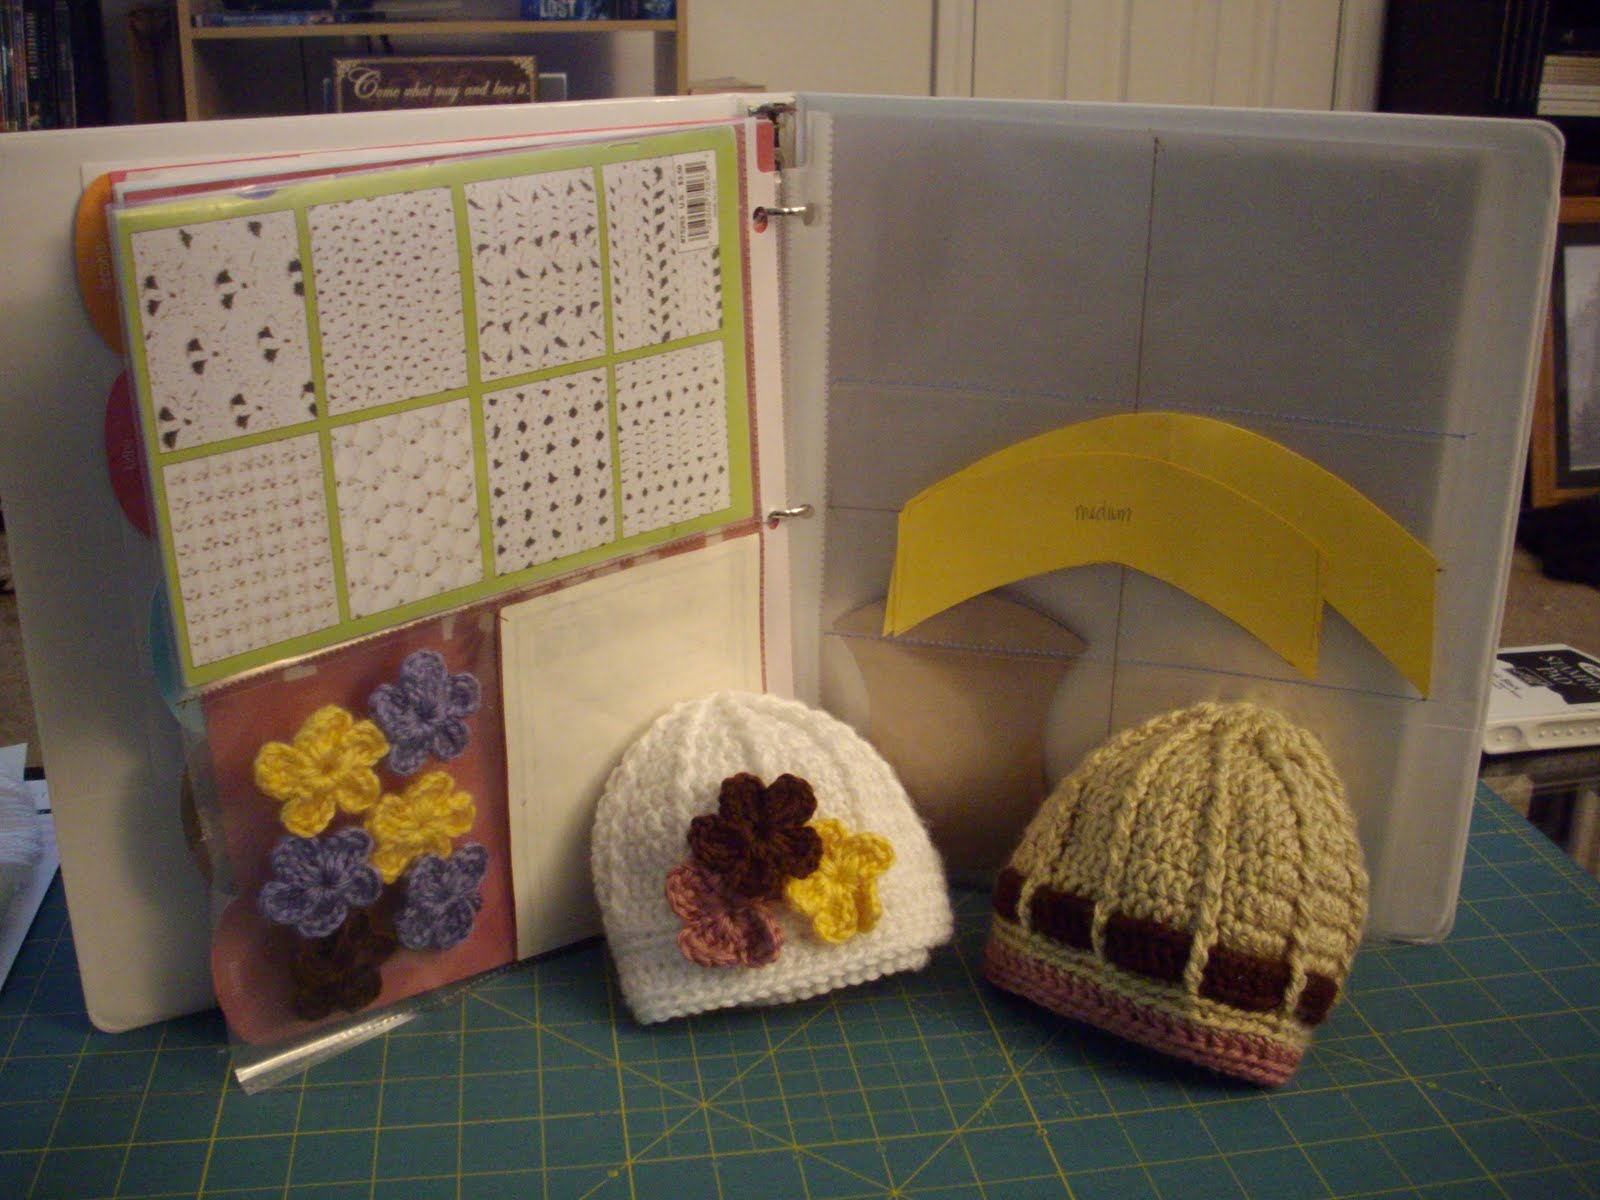
I have this small old binder that I have been putting my crocheting patterns in along with templates for quilts and other little nick-knacks. I was just using page protectors to toss everything in if I couldn't put a hole punch in to. It worked out pretty well to hold all those things and keep them in one spot. The only problem is that everything sinks to the bottom and the binder becomes lopsided.


How I fixed the problem was this. I took those page protectors and sewed pockets into them.

1st Step: take a thin piece of cardboard that fits into the page protector and draw a line on it as to where you want to make the pockets for the lower sections.


2nd Step: Take an exacto and cut along that line. {If you stitch before you cut the extra openings it hard to then cute it without going through the other side.}


3rd Step: When setting up my machine I put the length of the stitch to almost as long as it would go. If the stitches are too close together then as the needle goes through it will end up perferating the page protector and make it easier for it to tear along the stitches.

4th Step: Since the page protector is clear it was easy to look at the guides on my machine. If I was stitching where a cut was I left an 1/8th in seem allowance.


On the one's where I wanted to do a vertical stitch I took a piece of masking tape and placed it further in on the arm as my guide.


5th Step: Back stitching is out of the question, again, because we don't want to perforate the page protector to the point that it tears. I pulled both piece of thread to the back and simply tied them in a knot.


Final Step: Fill and stay organized!!! The binder has tabs that I have used to seperate the different types of mediums {for example crocheting and sewing}. These 'new' page protectors help me to keep my instructions and templates organized with everything else as well!!


I hope you enjoyed the tutorial.

As always ~ with every tutorial, if you like the idea but would rather purchase, leave me a comment. I'll set up a sale on my ETSY shop.

10.19.2009

Crafts for the kids

A couple of weekends ago my niece and nephew came up to stay with us for a couple of days. Whenever they come up here I always try to come up with a craft to make with them. Over the years I have collected quit an assortment of craft goodies, they are from school, old hobbies, new hobbies, all sorts of stuff. The craft has to be something that is easy enough for them to do and something that won't just end up on the floor or become clutter once they get it home. Lately I have been doing things with them that we can hang on the walls. This time we made a little wall hanging, or it could be place on a wall shelf. They wanted to remember the fall colors so this is what we came up with.


We just used some extra pieces of plexi glass and spray painted a frame on them. Then we took dried, flattened leaves and spay mounted them to the back side of the glass. After everything had time to dry we put clear transparency on the back to hold everything in place. It also gave to glass a more foggy look.

I'm happy to say that both of them loved their little project. I was pretty please about how they turned out too.

LinkWithin

Related Posts with Thumbnails