Showing posts with label Home Decor. Show all posts

4.18.2014

Sharpie Marker Easter Plate

Do you remember me sharing on Instagram that I keep some designs that would normally be weeded out on transfer paper until I can use them in another project? Well, that is what I did with this bunny.


It is time to try the hot trend of a Sharpie Marker on a dollar store dish...again. I have tried this over and over again and all those claims of the dishes being dishwasher safe and the marker is permanent ~ well, that has never been the case for me. Just using dish soap and water has always taken the Sharpie marker off. Here goes another attempt.

I used the bunny silhouette saved from my Peter Cottontail burlap decor piece to create this plate. Originally I was going to use a couple different colors but ultimately decided to go with straight black on white. Remember, the dollar store dishes {or cheaper dishes from Wal-Mart and other stores} will work best because the glaze on them is thinner and will help in the baking process.


Use rubbing alcohol and a cotton ball, wipe down the dish to clean and remove any dust or oils.

Because this image used a pom-pom for the tail I had to improvise and find something to create a tail. Lady A loves stickers and we have a few of these sticker packets on hand for her. So I used one that  looked like it was the right size...and am pretty pleased with myself for my quick improvisation.

Now take the Sharpie marker and start dotting around the image.


Bake the dish in the oven by placing it on a cookie tray. With your dish in the oven set it to 425 degrees, once the temperature is reached bake it for 30 minutes. Let the oven cool and prop the oven door open with the dish still in it. 

Letting the dish warm up and cool down with the oven will help to keep the shock of the temperature changes from cracking the dishes. One of the perks is that the paper stickers on the bottom of the dishes were baked off so I didn't have to put any effort into removing them.


I love how this turned out! It will be fun to bring it out year after year and remind us of this time in our lives, as we wait for Lady #2 to join our family, as our lives change with Paul graduating and we get ready to move. We have a lot going on this Spring.


***MY IMAGE STAYED AFTER WASHING***

I attribute it mostly to the higher baking temperature, every tutorial I read said to bake at 350. It should also be noted by washing I mean with warm water, a washcloth and soap and no scrubbing ~ just lightly going over the surface to wash it off.

Tips from this project:
  • Rubbing alcohol will help the marker make better contact to the dish.
  • I called Sharpie and they do not recommend using dishes with this Sharpie technique for food or drink. The markers are not food safe according to the USDA.
  • An acrylic spray can be used to cover the dish and will help keep the images from fading or washing away {remember not to use the dish for food with an acrylic coating}.
Check out my Peter Cottontail  post for the Silhouette Studio file where you can find this bunny.

4.17.2014

Peter Cottontail Framed Easter Decor

I loved using the burlap panels from Micheal's Craft Store when I created my Valentine sign I used them again to create some Easter Decor.

First I designed my vinyl cutout in Adobe Illustrator {I am more familiar with that program and feel like I can do more using it, including creating this cute bunny silhouette} then transferred it over to Silhouette Studio so I could cut the vinyl using my Portrait.

Here is what you will need to create this burlap sign:
Burlap panel
Paint in your choice of color {one or more}
Sponge brushes
Vinyl to cut & Transfer paper
Silhouette cutting machine
Silhouette Studio File {a .Studio3 file}
Frame
Hot Glue


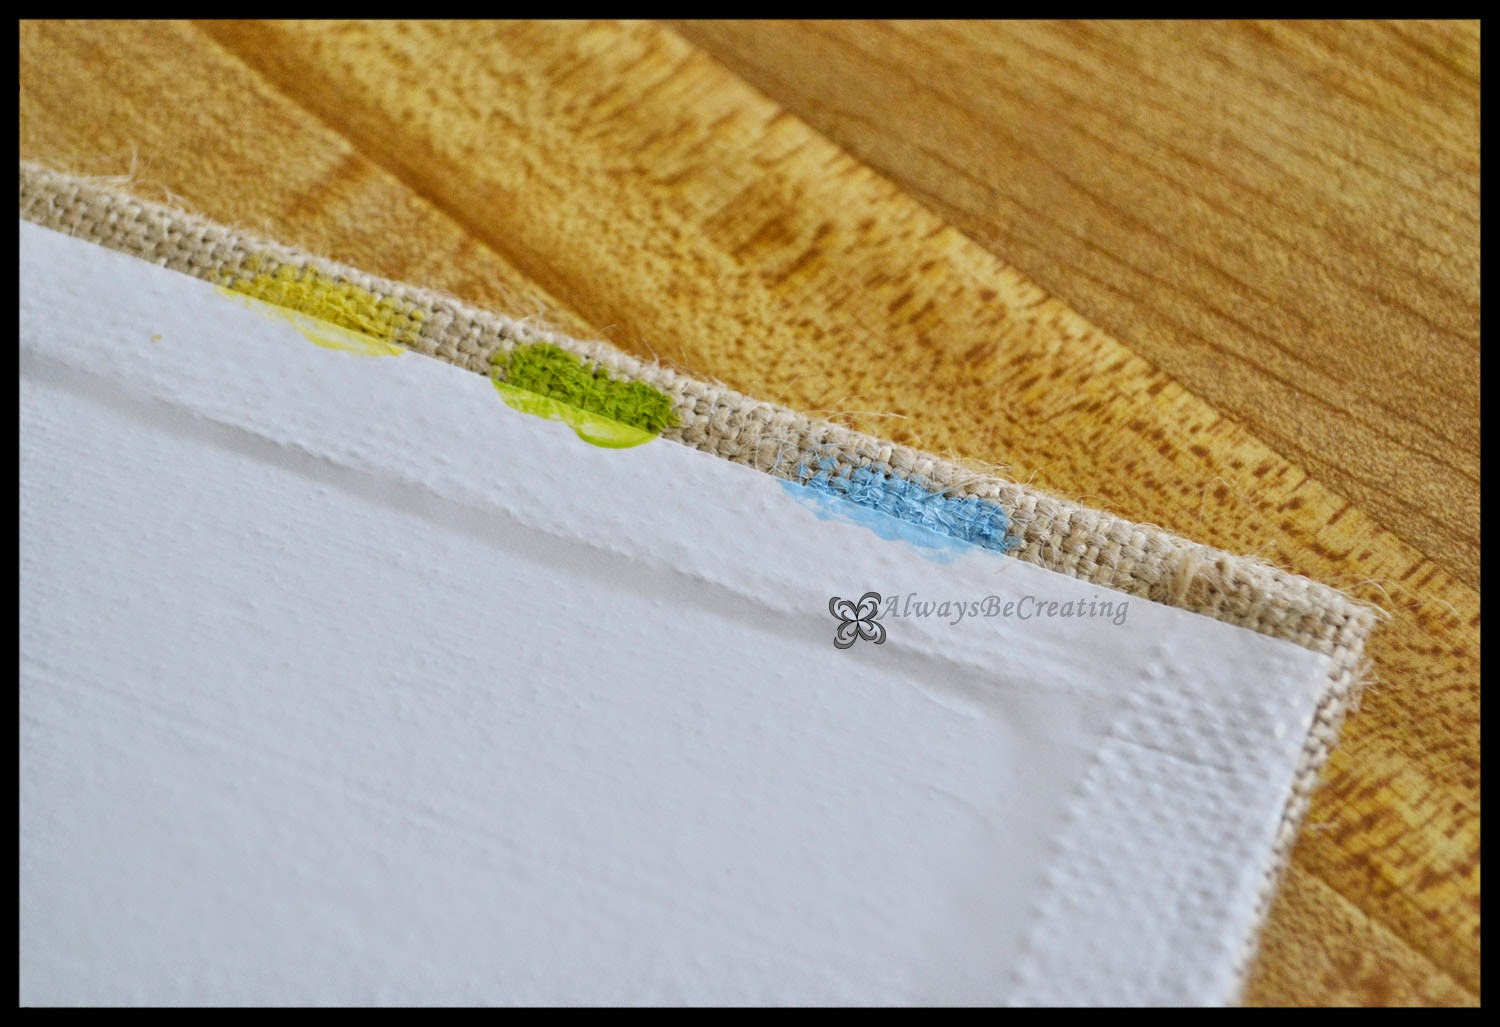
First weed out the image from the vinyl after it has been cut. Then use transfer paper to set the vinyl onto your burlap panel. 

I tested a couple of colors on the back of the burlap to see which I liked best and decided to go with the blue for text and white for everything else.


The white paint is Liquitex and I love it because it is a thicker paint so not as many coats are needed. but it is more expensive so I only have it in a few colors. The pastel blue is Craft Smart, a normal satin acrylic paint. I ended up doing two coats of white because when the first coat dried too much of the burlap brown color was coming through. The blue I did 3-4 coats because it was being absorbed into the burlap more so I needed to try and make it thicker.

After the paint has time to fully dry remove the vinyl and be sure to add a pom-pom to Peter Cottontail.


Originally I was planning on spray painting the frame white but it has been raining non stop and since I have a toddler at home and am 39 weeks pregnant, spraying in the bathroom and just turning on the fan was not an option :)


I love the blue color but with the vinyl removed it does not stand out as much as I was hoping. I'll see how I like if over the next few days and if I need to, figure out some way to change it just a bit. 

Here are some of my tips and tricks for painting on burlap using a vinyl stencil:
  • The font used in this project is Harrington, it is one that was already on the computer.
  • When using transfer paper do not worry about sticking the vinyl image to firmly to the transfer paper. Since the burlap surface is not the best surface for sticking vinyl to, it will come up with the transfer paper instead of staying on the burlap.
  • Go over the edges of the vinyl with your finger. This will help create a bond to keep the paint from seeping under the vinyl.
  • Dab, do not brush. This helps keep the paint from going under the vinyl, keeps the woven texture of the burlap and gets paint into all the crevasses.
Other projects using burlap:
I Love You Because...

3.14.2014

My Birthday Wish + Giveaway

This week is my birthday week {we say week because with a toddler, being 34 weeks pregnant and my husband finishing up his Graduate degree we never know when we will actually have time together ;) }. Paul has been asking me for weeks what I would want and honestly, the things I want can not be purchased....I want more sleep, I want to not be sore any more, I want my body back. These are all things that will come but there is no rushing them, then it hit me. This has been a long and cold winter, today did not even get out of the teens, it was snowing and the sun was only out for about 10 minutes. My birthday wish is that Spring would come....tomorrow.

Since it doesn't look like that wish will be coming true this week, according to the weather channel, I thought it would be fun to do a Birthday Spring Giveaway on a whim. Just enter using the rafflecopter at the end of this post.


I love this pillow case cover, it puts a smile on my face every time I see it. LilyPillow is donating a 16" x 16" pillow case for our giveaway.

Visit her shop and check out all her other fun colors and fabric choices to help bring a bit of spring inside.

There is also a $25 Target Gift Card. Use it for yourself or to add more spring around your home.

Good luck everyone and here is hoping it is warm where you are!!

4.30.2013

Image Transfer Using Acrylic Paint


I have been working on different techniques for transferring images and finally got this one perfected to the way I wanted it....so now, it's time to share with you friends.

Materials Needed:
Image printed on a laser printer {or a magazine clipping}
Plexiglas {fabric, stretched canvas boards, pieces of wood}
Acrylic Paint {non-water based}
Sponge brush 
Scissors
Water Spray Bottle
Acrylic Coating Spray

To prepare the image I added some text "I love you because..." then flipped it to print. I use Photo Shop but this can also be done in Picasa and most photo editing programs available. If your image doesn't have a right/wrong way skip this step and just print your image.

To make sure I got the image centered right where I want it. I placed the Plexiglas over the image, traced around it then cut the image.

I used a piece of Plexiglas to transfer my image onto for this specific project. These are pieces left over from another project but a small stretched canvas panel would work just as well. To get the Plexiglas prepped, simply take the plastic off of one side or clean the surface with a cloth and glass cleaner if the plastic was removed previous.


Put some acrylic on surface, use the brush to spread the acrylic. While paint is still wet place the image face down and smooth out making sure to get out any air bubbles so the entire image is pressed into the paint.

*Make sure you get a non-water based acrylic paint or gel medium.


LET IT SET OVER NIGHT!!
Make sure the paint has had plenty of time to dry.


Now grab your water bottle {or bowl with water and sponge to apply water to image}, towel and photo.

1 ~ Get the paper wet. {I let it sit for about 30 seconds or so, this will help the paper soften up}
2 ~ Start rubbing the paper with your finger tips. It will ball up and rub off. {You will have to keep the paper wet as you go}
3 ~ Everyone once in a while I would dab the image with the towel to get the paper residue off and see how well the image is coming along. {Using an image with so much white takes a little bit more care since it will blend with the acrylic paint, so...be careful not to rub too much}
*Repeat until all the paper has been rubbed off the image.


Once the image is dry take it out and spray with Acrylic Coating Spray. {Mod Podge will work great as a top coat as well}
*The clear coat will help protect the image since it is not going to be placed behind a piece of glass in a frame. It also helped the image pop out a bit and made it nice and crisp.


photo courtesy of Manda Jane Photography


Check out the steps to the Antique Frame that will be going with this image.


*I tried using this same image transfer technique with an Ink Jet image and it didn't work as well. Most of the image came up when rubbing the paper off and my fingers were blue for about a day and a half. Using an ink jet image might work well for an abstract project, where it doesn't need to be crisp.

3.08.2013

St. Paddy's Day Pillow

The truth: the pillow form tutorial came about because I already had a purpose for it, my St. Paddy's Day Pillow. NOW I can create as many covers as I want and just switch them out.

This Tutorial is two-fold today. First is the pillow cover design and tutorial and second is the image transfer. 


Pillow cover
Items needed:
Material of your choice
Flannel
Felt: Green and Fuchsia {one of each}
Text and Shamrock transferred onto material {transfer using nail polish remover}
Thread to match material {or felt}
Pins


First thing is first, everything needs to be cut out.
Material for pillow cover: One {1} piece: 15 1/2" {inches} x 10 1/2" {inches}
Two {2} pieces: 10 1/2" x 10 1/2"
Fuchsia Felt: One {1} piece: 2" x 9"
Image Transfers and Flannel: Place the transfer imaged material on top of flannel then cut out, this will help ensure that the pieces are cut to the same size. For mine I cut the material to leave 1/2" around the text and image. Making my pieces approx.:
'Lucky' 2 5/8" x 7 1/2",
'IN' 2 5/8" x 1 3/4",
Shamrock 4 1/2" x 4 7/8"
L V E letters: You can find a font you like, print them out then use that as a stancil to cut the letters out of the felt. I wanted very simple letters and it was faster for me to come up with my own then look through a bunch of fonts. Each letter is approx.: 2 1/2" x 4"

On the front piece of the pillow cover lay down the cut outs how you would best like.
*Remember that you will loose 1/4" on each side for seem allowance.


Pin down 'Lucky,' the fuchsia felt piece, 'IN' and the shamrock. I wanted the thread to match my pillow case colour and like how it stands out against the felt pieces. Sew approx 1/8" from the edges. Go around 'Lucky' and the shamrock. Sew a square on the top and bottom of the fuchsia felt and then around 'IN.'
*When the edges of the material start to fray, the flannel placed under the material with the transfers will fray as well and make it look more full instead of scraggly.


Now place and pin the L, V and E.
*Remember that when you need to pivot on a corner, leave the needle down before you lift the foot, this will help keep everything in place and lined up.
{Can you spot my mistake? I hate having to redo something because of simple mistakes. Argh! However, because of the mistake I figured a better order to attach the pieces on the cover, so the pictures are just a smidgen off of the tutorial.}


For the two back pieces, along one edge fold a crease at 3/4" and then at 1 3/4" so the material will fold in on the wrong side {just like your pant hem}. Fold twice on the creases and sew hem down. I sewed mine at 7/8" so it would be close to the fold on the inside.


Lay the front piece of the pillow case cover right side up. Place the back pieces right side down so that the hems are in the center and over lap while the edges match up with the front piece. Pin all the pieces together and sew with a 1/4' seem. When you get all the way back to where you started, lift the sewing foot and move the pillow case over slightly so that you can go around the pillow case using the zig-zag stitch.
*With the pieces over lapping in the back and the pillow being a bit longer for how short it is, there is no need for ties or buttons in the back. It will stay closed really well on it's own.


With the opening in the back be sure to sew all the way around the pillow case. Turn the pillow case right side out and make sure the corners are pushed out. Now stuff your pillow in there and watch your own handy work bring a bit of seasonal cheer to your room


My little girl loves it too! It's just the perfect size for her.

Get Creating!
~Mindy

3.07.2013

Image Transfer

I love playing around with photos and so I thought I would do a series on transferring images to different surfaces and share my findings with you {the good and the bad}.

Materials Needed:
Words and Shamrock PDF printed on a laser printer {download here or come up with your own}
Material {cotton works great}
Nail polish remover {not just any, look further down to see my explanation}
Sponge brush
Spoon


*Remember this will be a worn or vintage look, the transfer won't be crisp. It is best done with monotone images or images that don't have a great deal of detail.

Cut the image out leaving as much white space around it as possible.


Lay down an extra piece of cardstock, cardboard or anything you might have laying around, secure it with tape. Place the material on the cardstock face up {make sure it is flat and tight, secure it with tape} then place the text or image face down in desired location and secure it with tape.}
*From my material I cut pieces a bit larger than I knew I would want them and placed my text or image in the center. This would give me a bit of extra wiggle room and allow me to cut down to size.


With sponge brush or cotton ball apply a generous amount of nail polish remover to the paper over the text or image.
*Instead of covering the hole text or image at once, I did it one letter at a time. This way I could keep up with the nail polish remover before it dried.
*You can see in my image I used the Wal-mart brand nail polish remover, nothing too fancy or expensive. But I did find that the 'Regular' didn't work, it was the 'Strengthening' that ended up working like a champ. There are two extra ingredients listed, they are: benzophenone-1 and propylene glycol.


With the back of the spoon press and rub firmly across the text or image. The paper and material will shift so use your other hand to hold them firmly as they start to shift.
*Tip: You are applying a liquid to paper so try to work fast, don't take a brake in the middle of a section. Too much liquid and too much rubbing will dissolve/tear the paper and you'll have to start over. Too much rubbing will also cause the paper to be 'ground' into the material and leave paper behind with transfer. If this happens let the transfer sit and completely dry, then use a towel to get the paper residue wet and rub away with your finger. DON'T press hard or you will lift up the text/image transfer too.


*Tip: I had to repeat these last two steps a couple of times for every section of the text or image. Check  your transfer by lifting up one section of the tape and pulling the paper away from the material.


Once you are happy with your results, take the paper completely off.

I found that the larger the image, the more vintage it looked. Working with a smaller area, like the word 'IN' from my tutorial, it is easier to get most of the image to transfer and be a bit more crisp.

I am so excited about how it turned out. I think the text worked a lot better than the larger shamrock.

Check back to see the final project I use these image transfers for.

3.06.2013

Create Your Own Pillow Form

I love that there are pillow forms to purchase so all those fun pillow covers can be removed and washed, or changed, when needed. Every once in awhile I need or want a pillow of a not so standard shape or size. Now I'm going to share my tutorial for creating my own pillow forms.

Items needed:
Muslin (any color, I usually go with white. If your cover is going to be darker, I suggest getting a darker cotton fabric)
Fiberfill
Sewing machine
Thread
Ruler
Cutting mat
Rotary cutter

Pre-wash material.

Decide what size you want {for this particular project my cover will be 15" x 10"} then add 1/4" all the way around {my final measurement is 15.5" x 10.5"} and cut two. 


Line up the two pieces. In the middle of one side place marks for a width that will allow for your hand to fit in {mine is a 4" opening}.

Because this pillow will go inside of the pillow cover it needs to be just a bit smaller. This will allow for the cover to be placed on and taken off easier. Starting at the bottom 'opening' mark sew around the pillow form using a 3/8" seam allowance until you reach the top 'opening' mark.
*If you want you can also back stitch once or twice on either side of your 'opening' to help keep the seem tight.


*Tip: When getting to a corner sew up until you think you will need to change directions. I even measure to make sure the last stitch is where it needs to be. Leave the needle down, lift the foot and rotate your material. This will help so that the corners of the pillow form will be nice and sharp.

*If you also choose too, you can serge around where the straight stitch is. For a simple pillow form I will just use my zig-zag stitch.


Now turn the pillow form right-side out. Just reach in the opening and pull the right-side out. Then reach back in and use your finger, pencil with eraser or round tip scissors to push out the corners to make them nice and crisp.


Fill the form with Fiberfill to make your pillow form as full as you want.
*I reach in and make sure that some of the fill gets into the corners to help shape the pillow form.

Once you have enough fill in your pillow form push it down a bit to give yourself working room to sew the 'opening' closed. Pull the two sides on either side of the 'opening' and line up the sides of the opening, finger press and even place pins if you would like. Sew right at the edge of the opening from the top to bottom to sew the pillow form closed. On this one I missed a little section, if you do too, simple take it back to your machine and sew it closed.

With this stitch on the outside {even though it will go inside a pillow cover} I still want it to look nice so I simply tie the thread ends into a square knot and cut off the extra.

Voila ~ Pillow form!!

9.22.2012

Hanging a Frame ~ Right Where You Want It!

Over the first four and half years of our marriage we stayed in the same place but the last year and half, we have moved a handful of times. From all of this experience there are a few things that, I have become pretty good at, I think anyways.

One of these things is hanging frames. I love to have stuff up on the walls, family photos, frames, shelves, vacation memories, etc. My husband does not love this so much because I am a bit of a perfectionist when it comes to making sure everything is right where I want it and that it is hanging straight on the wall, this usually means we have more nail holes in the wall than actual nails.

Here is a great, fast way to make sure I get the nails in the right spot the first time.

What you'll need:
Hammer, Nails, Level, Tape, Thumb tacks, Frame {or other item to hang}.


First lay your thumb tacks so that the needle part is up. Take a piece of tape, sticky part down, and press over the point of the thumb tack so the point pokes through and press the tape firmly against the back part of the tack to make sure it sticks.


Then you will tape the thumb tack on the back of the frame right where the nail will go to hang it.

If your frame requires two nails, {like mine} put the second thumb tack in place.


Now with the level {you might have someone help you with this part} place the frame in the desired location and use the level to make sure that the frame is straight.

With a little bit of pressure you will push the frame where the thumb tacks are so that they will mark the wall. You can have them leave a superficial mark or push hard enough that they will push into the wall. {I pushed into the wall so I could get a photo and show you.}

You can always double check your work to make sure you didn't slip when you were marking the wall.
 

All that is left to do is hammer the nails in place and hang the frame.

Perfect!! Two nails and only two holes. My husband is so pleased.


4.14.2012

Baby Blankets

I LOVE having tons of blankets around.

As I walked out to my living room the other day I suddenly realized how many blankets we have, and it is such an eclectic bunch. Blankets from far off places, ones that I have made for my husband and daughter and many more that others have made for us. I think giving someone a blanket is a wonderful way to say 'I Love You!' They are warm on a cold day, comforting when you need to curl up, perfect to take out side and lay on the lawn during a wonderful summer evening. We have them all over the house for whenever the moment calls for a nice cuddly blanket.

After seeing all the wonderful handmade blankets our little girl received from family I decided I wanted to help share that love that a handmade blanket can bring. Check out my ETSY store for the latest and great deals. Find that special blanket that says you love them.


1.19.2011

Can You Guess....

We moved on New Years Eve. I know, not the best time to do it but that is really all that was available to us. My husband just finished his two Bachelor Degrees and so we moved back to be with family. Can I tell you I have loved being around family. We have time to visit everyone, when we used to come down on weekends we already had tons to do and we always felt bad about those that we didn't get to see.

I have a couple of projects to finish up and wanted to share what I have going on.

Can you tell from this picture what we will be making. They are so cute but why buy them when you can make your own and make them exactly how you want them!!! It might take some time but trust me, well worth it.

Not everything is where it should be since we have moved and I can not find my wire cutters. The gold beads have wire stems and I'll need to trim them down. So for now you will just have to wait in anticipation. Trust me, it will be worth it.

LinkWithin

Related Posts with Thumbnails