Showing posts with label Kids. Show all posts

12.19.2015

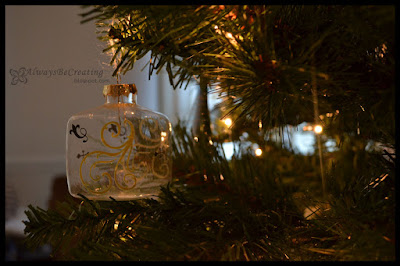
Silhouette Ornaments


Remember that tutorial I shared on how to create a silhouette using Adobe PhotoShop? Well, now we are going to create a project with it.


Be sure to look over my tutorial on how to use Photoshop to create a Silhouette. Don't forget that Amazon has a free 30 trial that comes with access to their Creative Cloud. I am over the moon excited about how these turned out!!!

Ok, that is enough. Now to show you how I did it.


: : : : : : : : Material/Supplies : : : : : : : : 
Glass/Plastic clear ornament bulbs {I used the flat ones, the image stays better in them}
Printed image

: : : : : : : : Tools : : : : : : : : 
X-acto Knife {or scissors}

: : : : : : : : How To : : : : : : : : 
Once you have your silhouette created, open up a blank page in PhotoShop, bring the image over onto the new page and scale to a size that will fit within the clear ornament, mine are 3" bulbs. Create duplicates if you need them.


Print out on normal printer paper. 


Cut out the silhouette image.

Here is how I did it:
Mark on the circle cutter for the size you want {3"}. Place on the silhouette image then spin the tray to make sure the image is centered in your 3" diameter.

NOTE: I only moved the cutting wheel once I had it marked to take a photo and show you how it looked. Normally I would not move it because lining it back up takes too much time.


Cut the circle around the silhouette leaving a small section at the top. Take the x-acto knife {or scissors} and cut a 'neck' on top.
TIP: This will help keep the paper from rolling around in the bulb and keep the image upright instead of sideways.


Roll the cut out around the handle of the x-acto knife {or pencil}.
NOTE: I kept the image facing out because once it is placed in a bulb it will keep a little bit of a curl.

Stick the handle of the x-acto knife {or pencil} in and help to unroll and flatten the paper.


Use an ornament hook or ribbon to hang the bulbs.


Sometimes simple really is easy and best. I love how these look on the tree, will treasure them forever and we are so excited to send some to grandparents as well.

I would love to hear from you and see your projects. Leave a comment or #AlwaysCreate on your photos in Instagram. Find me on Instagram {@AlwaysCreate} and follow along for behind the scenes.

Other Handmade Ornaments


Fast and simple ornaments


Pony Bed Ornaments

11.18.2015

Create a Silhouette of Your Kiddo Using Photoshop

I have wanted to try creating silhouettes of my girls and this is what I came up with.

I remember doing these as kids. We would place a flashlight on the edge of a counter or chair, stand in front of it to cast our profile onto a paper hanging on the wall. Then someone would trace our shadow, it was not a perfect system. Depending on how close you were to the flash light your silhouette could end up pretty big, too far away and it would be smaller but fuzzy and some detail would be lost.


One day I was working at the desk and I caught a glimpse of LadyA with her cute pony tail. That's it! I'll do a silhouette for her, she will love it, we can even use it for Christmas ornaments. And she did!

There are a lot of ways to go about creating a silhouette. Here is how I did it on my computer with Photoshop. I am by no means a top expert but I am excited to share with you some of the techniques and keyboard shortcuts I use.

Did you know that Amazon has a section for Subscription Software? I know, I had no idea either!! Right now they have a free 30 day subscription for Adobe Photoshop then you can go month to month or do a 12 month subscription.

Warning: this project could take a little bit longer than you think as you follow along the first time, but then you will be a professional and can wiz through making the next ones, just like when I thought you how to bring a cut file from Adobe Illustrator into Silhouette Studio.

Alright, here it is. This might be a bit long but I am trying to be VERY thorough.

: : : : : : : : How To : : : : : : : : 

1. Once the kiddo has their hair done and a shirt on {if you want a collar at the base of their neck} have them stand in front of a contrasting background. Our backdrop was a yellow set of drapes, the light coming in helped create a good contrast. The problem area was the end of the ponytail and the moving boxes but the rest of the image has a great contrast.
   

2. Upload and open the image in Photoshop.
Change the levels of the image.
Go to: --> Image --> Adjustments --> Levels
Use the Input Levels grid to play with the contrast of the your image by moving the black and white levels to the middle until you like the contrast achieved.


NOTE: At some point you will need to unlock the photo layer. Double click on the layer, set color to 'None' and click ok. This will allow parts that need to be deleted, to be completely removed instead of just changing it to an overall color wash.


3. Change the image to Black & White.
Go to: --> Image --> Adjustments --> Black & White.
Change the different levels until you get a good contrast. I changed the yellow because of the drapes and red to increase the contrast with her skin.


4. Now use a combination of the Rectangular Marquee Tool and the Magic Wand Tool to select all the background image that is not needed.

*First use the Rectangular Marquee Tool to select the big parts of the image that will be deleted.

*Now use the Magic Wand Tool and click around the image to finish selecting background. This helps to select items with odd shaped edges, ie: around the face and hair.

NOTE: After making the first initial selection with the Rectangular Marquee Tool, hold down 'shift' on the keyboard. This will allow you to add more to the original selection.

NOTE: If you select something that you do not want selected {which can easily happen using the Magic Wand}, release the 'shift' key and press CTRL Z to undo your last step. Then press 'shift' again to continue selecting the background.


5. It's time to fine tune the selection. At the bottom of the toolbar click the Edit Mode button. I like this to help fine tune my selections. Using the Paintbrush with either black or white {change the size of the brush stroke up at the top left side of your screen or I use the '[' and ']' on the keyboard to decrease or increase the size of the brush.

When white is being used, anything you click on will clear the pink away. If black is being used than anything you click on will appear in pink.

Click on the Edit Mode button from the side tool bar to go back to the Standard Mode.


6. Click the 'delete' button on the keyboard and everything that is selected will be removed. Then turn off the selection by clicking CTRL D on the keyboard.

Use the move arrow to move the silhouette if you would like to where you want it on the page.

Create a new layer and move to the bottom of layers.
--> Over on the layers tool box is a little button on the bottom to create a new layer then just drag the new layer to the bottom of the stack.

NOTE: Because the photo layer is unlocked, the background will be completely cleared. This will allow you to do some other edits but we will not get into them right now.

Use the paint bucket to drop white {or color of your choice} into the bottom layer.

NOTE: Make sure you have selected the correct layer that you want to work on to finish the project.


7. Create a new layer. Make sure it is the top layer.

While on the original image layer use the Magic Wand to select the empty space around the silhouette image. Then change the selection to the inverse.
Go to: --> Select --> Inverse

Switch to top layer, use the paint bucket and black {or color of your choice} to drop black into the selected silhouette space.

Deselect silhouette.

Now you can go in with the eraser or paintbrush and help fine tune any areas that might need it.


Now you are done!!


When I save my files for a project like this I will save it as a .jpg to print as well as a PSD. The PSD file will keep the different layers and then I can go in and try different things on it if I want to, such as adding text, color, etc.

NOTE: Be sure to save your image as you go along so that you won't loose any of the work you have already done.

Don't forget to stop by Amazon to check out their Subscription Software and get a free 30 day trial of Photoshop.

The great thing about doing this project digitally is that you can use the silhouette in so many different ways. Share your silhouette project with me in Instagram. Be sure to tag me in your post and add #PhotoShopSilhouette.

3.10.2014

Creating a Pellet Pillow

Have you seen the Yogibo? It is a great bean bag for the family room, bed room or reading nook. Lady A loves them and while our niece and nephew were out visiting us they got to play on some at our local library and Children's Museum. All the kids loved them and had a blast having Paul throw them into a pile of Yogibo bags.

It feels like we are bursting at the seems of our little apartment so there is no place for the giant bean bag but I still wanted to get Lady A one. I compromised a little bit and ended up buying a box of refill pellets. Do you see the size of that box? It's huge! So I'll be using the refill pellets for a couple of projects.


Here is the super simple project and one my daughter loves.

I took two pillowcases: one has Pooh Bear and a simple white one.

I measured out the two and made sure that the simple one was about 1/4"-1/2" smaller width than the Pooh Bear pillow case and that the length was a few inches shorter so that it would sit in the pillow case like a normal pillow.

Because I can be a bit of an A-type personality, I trimmed my white case so that it was nice and square. Then I stitched up all the sides leaving an opening about 3" wide to allow me to fill the case.

Since the pellets can be a bit of a challenge I decided to use a funnel made out of newspaper so that they would not get super static-y and fly away.

My husband helped me with this part, 4 hands were much better than 2 for this project. To help keep the newspaper funnel and pellet case from sliding apart I used two clips that I had laying around, this made it so much easier to fill the case.


Once you have the cas as full as you would like it, fold in the edges and top stitch to close the opening. Place in the themed pillowcase and viola!! Lady A loves her pillow. We got her a nice soft pillow for her bed but she still prefers to use this one at bedtime. I love when the things I make for others are loved!

Paul has even made good use out of the pillow a time or two!


These boxes were sold by weight, when I called no one could tell me the space or volume of the box so I ordered the larger box to be on the safe side. Since then I was able to suggest to the company to include the volume along with the weight and sure enough it was added that week. They had great customer service over the phone and at the shop we went to.

The 7lb box of pellets were A LOT more than I was planning on but that is ok because I have some great ideas for them....stay tuned!!!

4.24.2013

Bean Bag Bananza

Lady A went to nursery for the second time this past Sunday but for some reason she was not having it. In the middle of my Sunday School class {I teach the 9-10 year old kids} I could hear a scream from the hall, sure enough, I poke my head out and it was my kid, for everyone to hear.

After I was done teaching my class we both went back to the nursery for the last bit of church. There were a far number of kids and one of the choice tows were bean bags but there were not enough for all the kids. A benefit of sewing is that there are always scraps around so I decided we would make some more bean bags for the kids.

 16 Bags

 With your scraps cut out squares that are 5 1/2" x 5 1/2"

 With wrong sides together, stitch three and a half of the sides. I like to leave my opening in the middle of one side. For me, it makes it easier to stitch closed.

Take a random piece of paper to make a funnel. I found this was better than using a kitchen funnel because I could leave the opening wide enough to let the beans through.

Then I needed to take a photo and needed a third hand...and here came the bright idea, set the bag in a cup!! It works great to hold everything in place while pouring the beans in, lift the cone out and the job is done.
I tried a few different amounts and decided that 2/3 cup was the perfect amount, for me.

 Ya...I made 16 bean bags.

 Now simply pin the bag closed then sew it up and cut the thread.

Some for Lady A, some for the neighbors and the rest for the nursery kids.

Happy bean bag toss!!

4.02.2013

Adding Grip to Socks

For Easter, one of the gifts Lady A got in her package from Grandma was a pack of socks. YEA!!

I know, it's not the most glamorous thing but they are needed. She isn't even 18 months old but she is in 2T+ for cloths and socks are no exception. But at this size/age, it is not the norm for socks to have the non-slip grip on them, you have to search them out and they cost a bit more. My little darling is not coordinated enough just yet to be on slippery surfaces without some help. She doesn't walk anywhere, it's always running, stopping is falling or running into the wall.


While I was looking for something to go with a separate project I am working on I came across some fabric puff paint, this stuff is actually called fabric writers. {Light Bulb} To help Lady A stay up on her feet I decided to add the non-slip grip myself. All you need are the socks and the puff paint.


When adding the puff paint to socks there are a couple of things to be careful of. For instance, no one likes it when there is a pebble in their shoe {or sock} so make sure not to create huge bumps on the bottoms by adding too much puff paint, but if you don't add enough it won't do any good. I would recommend using the puff paint on a scrap piece of fabric first so you can get a feel for how it works. Put the socks on their sides and add two strips to each side, the puff paint can go through the material if it is pressed in too hard so try to keep your hand steady and not push down when adding the puff paint. As the puff paint dries the 'puff' of it might go down some, this just depends on the type you will use, feel free to go back and add a little more.


Viola! Now she has a whole pack of non-slip socks. Life is good.

We spent last weekend testing them out and they worked great!

2.20.2013

Pipe Cleaner Toy

I love when the stuff that  i am going to buy already comes in containers that I can reuse. When we are done reusing it, into the garbage it goes. This is great because I am one of those that has a hard time paying for containers that don't last or that I know will be destroyed but little hands.

Today's reused packaging comes from ... the fridge! Originally I was going to do this project with a large juice jug and drill some holes in the lid but we finished off the Parmesan cheese first, and the lid works better too.

This little toy will be used to help with fine motor skills by placing the pipe cleaners into the holes of the lid. It can also help with counting and colors once she is old enough and talking!

Items needed:
Cleaned out jar
Pipe cleaners
Hot glue gun/glue sticks
Wire cutters


Place a little bit of glue in the groove and place one end of the pipe cleaner there.

Once that is set, wrap the pipe cleaner around the jar nice and tight. Put a bend in the pipe cleaner where it matches up with the beginning, this will 'mark' where you will cut the pipe cleaner.

Place another drop of glue and fasten the end. Be sure to pull it nice and snug. Repeat, and place pipe cleaners in all the grooves of the jar. Since the pipe cleaners are placed in the grooves you don't need to glue around the whole jar.

Cut a bunch of pipe cleaners in half so they can be placed inside.

Yea!! She likes it.

1.05.2013

Mega Bloks Box into a Tote

While we were out in Pennsylvania visiting family for Thanksgiving Abigail was introduced to Lego's, she loved them! Her first tantrum we ever experienced was one night when we took the Lego's away to get ready for bed. We were all thrown for a loop, this was not a regular thing for Abigail, we couldn't help but just sit and watch.

Since she seemed to have such a love for them and they are the perfect size for her little hands, she got some for Christmas. Lately she has also been trying to stack items, put lids on stuff and put anything that fits - into something else. This little bucket of Mega Bloks does it all: building blocks, lid, room to put more stuff in.

To help keep the lid with the bucket I came up with a way to attach it.

Now, I'm sure I could have just taken a photo of the finished project and you could have figured out exactly what I did.....but I got a new camera for Christmas and so I have step by step photos. Tee~hee~hee.

The Mega Bloks bucket has holes on both sides where the zip ties were placed to keep it closed at the store.

I used 16" {inches} of 1/4" ribbon and a couple of random beads.

String the bead onto the middle of the ribbon. Fold the ribbon and put the two ends together then lace through the hole in the lid and the bucket from top to bottom.

Once the ribbon is laced put the lid in place so that there will be as much slack as possible. I singed the ends of the ribbon but you can use some type of fray glue. Then tie a knot with the ends of the ribbon.

The beads on the ribbon help keep the ribbon from just slipping all the way through the holes and keep it all attached.
Boom!! Now the lid will stay with the bucket and she has a handle to drag it all over, bang it into walls and ram the corners.

10.16.2012

Lady A's Birthday Outfit

I wanted to get some pictures for Lady A's birthday with the wonderful fall colors out here in New England. Since I am not too familiar with the area I had a friend come with me. I love this little out-fit and even more excited about the top.

This is my first re-purpose design and I could not be more please with how it turned out.

After all day shopping I finally found everything I was looking for: Boots, skirt and a top. The top was a tank top, size 2T, it was too big and too cold for her to wear it so I had to do a little work to it.

First I cut the ruffle off around the bottom. I wasn't too worried about the bottom of the shirt rolling or fraying since her pictures were going to be done the next day but you can roll the bottom once or twice to put a hem at the bottom of the shirt.

I took the extra ruffles and used them to make sleeves and a piece to the front to make it go a little higher.

For the cap sleeves I cut two pieces about 6" long. Look at the picture to see where I have drawn a dotted line. After lining up the center of the 6" ruffle to the top o the shoulder I pinned the rest of the sleeve lining up the invisible line with the seem of the arm hole. Then I simply sewed right along the existing seem. 

I used some extra material, felt and mesh material to add a little flare dress up the cute little shirt and match her hair clip I made

I am sorry to say that Lady A dropped the camera so all the photos to go along with this tutorial were lost. There will be plenty of other re-purposed shirt tutorials but here are some photos of the our little girl in her fun little birthday outfit.

 She was NOT going to give up her blanket!


LinkWithin

Related Posts with Thumbnails