
Remember that tutorial I shared on how to create a silhouette using Adobe PhotoShop? Well, now we are going to create a project with it.


Be sure to look over my tutorial on how to use Photoshop to create a Silhouette. Don't forget that Amazon has a free 30 trial that comes with access to their Creative Cloud. I am over the moon excited about how these turned out!!!
Ok, that is enough. Now to show you how I did it.
Ok, that is enough. Now to show you how I did it.

: : : : : : : : Material/Supplies : : : : : : : :
Glass/Plastic clear ornament bulbs {I used the flat ones, the image stays better in them}
Printed image
: : : : : : : : How To : : : : : : : :
Once you have your silhouette created, open up a blank page in PhotoShop, bring the image over onto the new page and scale to a size that will fit within the clear ornament, mine are 3" bulbs. Create duplicates if you need them.

Print out on normal printer paper.

Cut out the silhouette image.
Here is how I did it:
Mark on the circle cutter for the size you want {3"}. Place on the silhouette image then spin the tray to make sure the image is centered in your 3" diameter.
NOTE: I only moved the cutting wheel once I had it marked to take a photo and show you how it looked. Normally I would not move it because lining it back up takes too much time.
NOTE: I only moved the cutting wheel once I had it marked to take a photo and show you how it looked. Normally I would not move it because lining it back up takes too much time.

Cut the circle around the silhouette leaving a small section at the top. Take the x-acto knife {or scissors} and cut a 'neck' on top.
TIP: This will help keep the paper from rolling around in the bulb and keep the image upright instead of sideways.

Roll the cut out around the handle of the x-acto knife {or pencil}.
NOTE: I kept the image facing out because once it is placed in a bulb it will keep a little bit of a curl.
Stick the handle of the x-acto knife {or pencil} in and help to unroll and flatten the paper.

Use an ornament hook or ribbon to hang the bulbs.

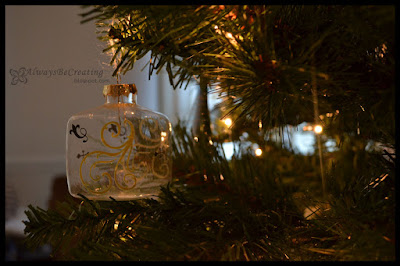
Sometimes simple really is easy and best. I love how these look on the tree, will treasure them forever and we are so excited to send some to grandparents as well.
I would love to hear from you and see your projects. Leave a comment or #AlwaysCreate on your photos in Instagram. Find me on Instagram {@AlwaysCreate} and follow along for behind the scenes.

Other Handmade Ornaments
Fast and simple ornaments
Pony Bed Ornaments


