Showing posts with label Acrylic Paint. Show all posts

4.17.2014

Peter Cottontail Framed Easter Decor

I loved using the burlap panels from Micheal's Craft Store when I created my Valentine sign I used them again to create some Easter Decor.

First I designed my vinyl cutout in Adobe Illustrator {I am more familiar with that program and feel like I can do more using it, including creating this cute bunny silhouette} then transferred it over to Silhouette Studio so I could cut the vinyl using my Portrait.

Here is what you will need to create this burlap sign:
Burlap panel
Paint in your choice of color {one or more}
Sponge brushes
Vinyl to cut & Transfer paper
Silhouette cutting machine
Silhouette Studio File {a .Studio3 file}
Frame
Hot Glue


First weed out the image from the vinyl after it has been cut. Then use transfer paper to set the vinyl onto your burlap panel. 

I tested a couple of colors on the back of the burlap to see which I liked best and decided to go with the blue for text and white for everything else.
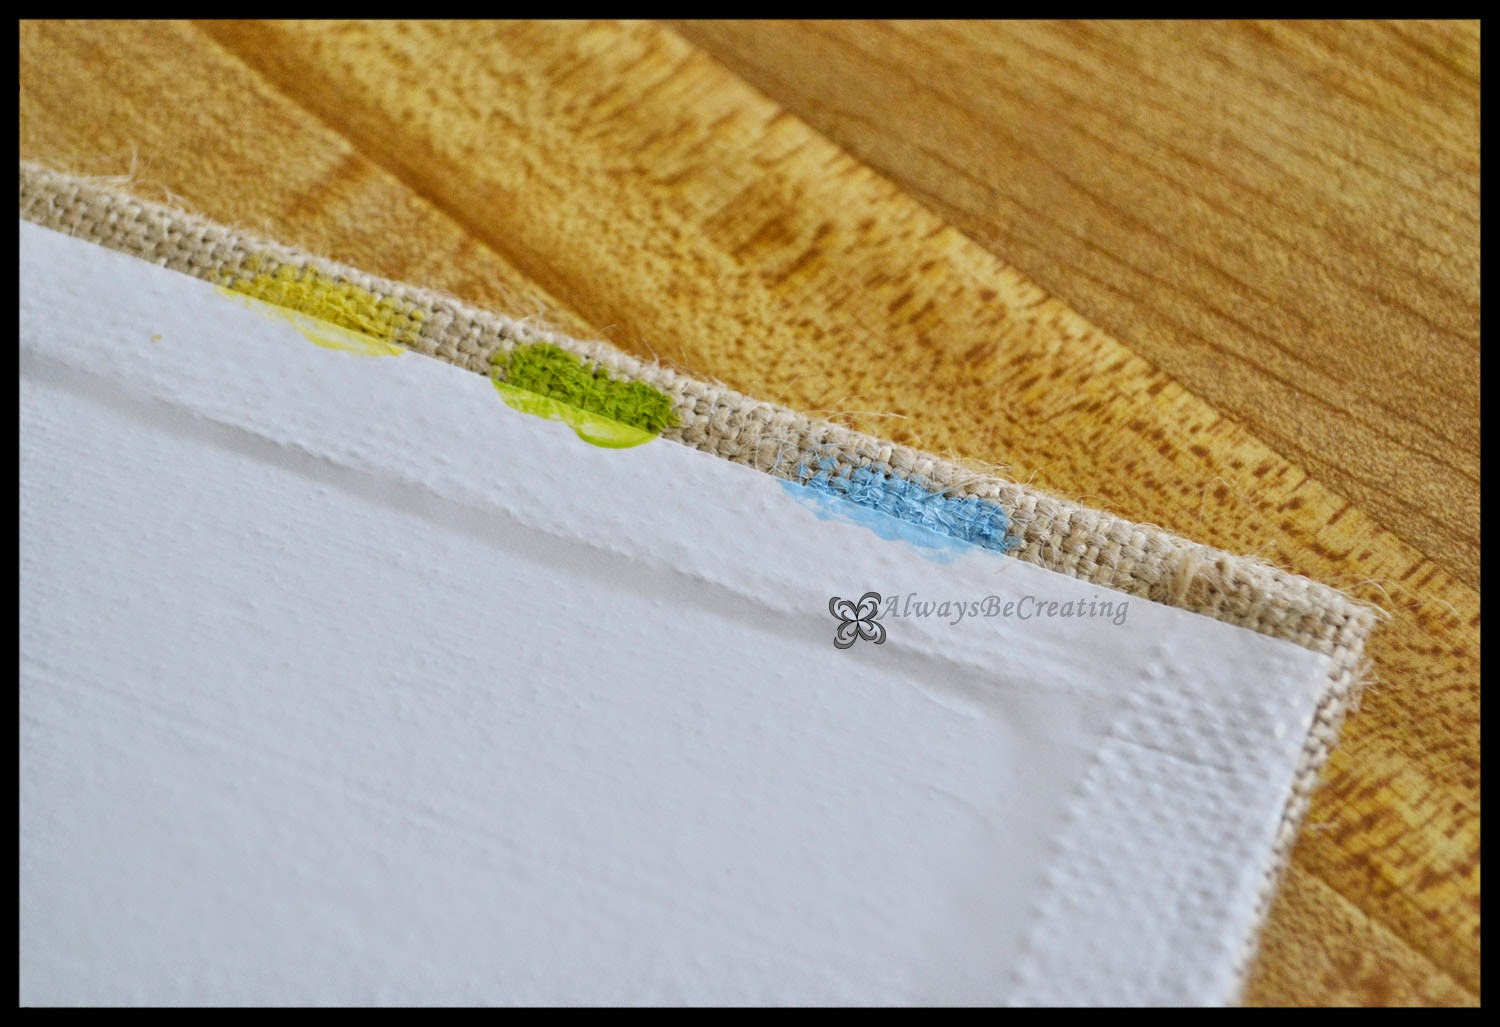

The white paint is Liquitex and I love it because it is a thicker paint so not as many coats are needed. but it is more expensive so I only have it in a few colors. The pastel blue is Craft Smart, a normal satin acrylic paint. I ended up doing two coats of white because when the first coat dried too much of the burlap brown color was coming through. The blue I did 3-4 coats because it was being absorbed into the burlap more so I needed to try and make it thicker.

After the paint has time to fully dry remove the vinyl and be sure to add a pom-pom to Peter Cottontail.


Originally I was planning on spray painting the frame white but it has been raining non stop and since I have a toddler at home and am 39 weeks pregnant, spraying in the bathroom and just turning on the fan was not an option :)


I love the blue color but with the vinyl removed it does not stand out as much as I was hoping. I'll see how I like if over the next few days and if I need to, figure out some way to change it just a bit. 

Here are some of my tips and tricks for painting on burlap using a vinyl stencil:
  • The font used in this project is Harrington, it is one that was already on the computer.
  • When using transfer paper do not worry about sticking the vinyl image to firmly to the transfer paper. Since the burlap surface is not the best surface for sticking vinyl to, it will come up with the transfer paper instead of staying on the burlap.
  • Go over the edges of the vinyl with your finger. This will help create a bond to keep the paint from seeping under the vinyl.
  • Dab, do not brush. This helps keep the paint from going under the vinyl, keeps the woven texture of the burlap and gets paint into all the crevasses.
Other projects using burlap:
I Love You Because...

4.30.2013

Image Transfer Using Acrylic Paint


I have been working on different techniques for transferring images and finally got this one perfected to the way I wanted it....so now, it's time to share with you friends.

Materials Needed:
Image printed on a laser printer {or a magazine clipping}
Plexiglas {fabric, stretched canvas boards, pieces of wood}
Acrylic Paint {non-water based}
Sponge brush 
Scissors
Water Spray Bottle
Acrylic Coating Spray

To prepare the image I added some text "I love you because..." then flipped it to print. I use Photo Shop but this can also be done in Picasa and most photo editing programs available. If your image doesn't have a right/wrong way skip this step and just print your image.

To make sure I got the image centered right where I want it. I placed the Plexiglas over the image, traced around it then cut the image.

I used a piece of Plexiglas to transfer my image onto for this specific project. These are pieces left over from another project but a small stretched canvas panel would work just as well. To get the Plexiglas prepped, simply take the plastic off of one side or clean the surface with a cloth and glass cleaner if the plastic was removed previous.


Put some acrylic on surface, use the brush to spread the acrylic. While paint is still wet place the image face down and smooth out making sure to get out any air bubbles so the entire image is pressed into the paint.

*Make sure you get a non-water based acrylic paint or gel medium.


LET IT SET OVER NIGHT!!
Make sure the paint has had plenty of time to dry.


Now grab your water bottle {or bowl with water and sponge to apply water to image}, towel and photo.

1 ~ Get the paper wet. {I let it sit for about 30 seconds or so, this will help the paper soften up}
2 ~ Start rubbing the paper with your finger tips. It will ball up and rub off. {You will have to keep the paper wet as you go}
3 ~ Everyone once in a while I would dab the image with the towel to get the paper residue off and see how well the image is coming along. {Using an image with so much white takes a little bit more care since it will blend with the acrylic paint, so...be careful not to rub too much}
*Repeat until all the paper has been rubbed off the image.


Once the image is dry take it out and spray with Acrylic Coating Spray. {Mod Podge will work great as a top coat as well}
*The clear coat will help protect the image since it is not going to be placed behind a piece of glass in a frame. It also helped the image pop out a bit and made it nice and crisp.


photo courtesy of Manda Jane Photography


Check out the steps to the Antique Frame that will be going with this image.


*I tried using this same image transfer technique with an Ink Jet image and it didn't work as well. Most of the image came up when rubbing the paper off and my fingers were blue for about a day and a half. Using an ink jet image might work well for an abstract project, where it doesn't need to be crisp.

4.16.2013

Antique Frame Technique

Have you seen those crackle paint frames? Have you wondered how to make one? It is super simple, let me walk you through it.

Keep in mind that each step is simple and goes pretty fast. The project as a whole takes time because the different layers need time to dry as each one is completed. I would also recommend trying it out on a scrap piece of wood {a 2 x 4 would be great} so you can understand how your stain, glue and paint all work together.


First gather all your stuff: Wooden frame, Wood Stain, Hyde Glue, Paper Cup {to mix}, Water Base Paint, Paint Brush {I used a sponge brush}, Sand Paper.

These first few steps are optional but I like to use them.
{Optional} If you need to, or choose to, sand the frame to smooth it out.


{Optional} Stain the frame according to the directions on the bottle. If it needs time to set, be sure to allow for that. Adding stain first adds a great contrast to show between the cracks of the pain. Sand down to add some personality to your frame.


In the small paper cup mix Hyde glue with water. For this project, since the frame is a smaller one, I mixed 3 parts glue and 1 part water. With the sponge brush add to frame {I added a second layer after the first dried}. ~ Make sure it dries before moving on.

*The less water mixed in with the Hyde glue the thicker the cracks will be. If thinner, more subtle cracks are what you are looking for mix more water into Hyde glue.
{I use a woodworkers Hyde glue for the crackle affect. There are a number of crackle paint products out now that you are sure to find at your local craft stores. I haven't tried any of them so, unfortunately, I don't have any insights as to how they all differ. But I can tell you I like using the Hyde glue for a couple reasons, fist being that this is what my dad used when he taught me the crackle paint technique so I am already familiar with this technique. The Hyde glue can also be used for my wood working projects.}


Normally I use left over {water base} paint from a can but I don't have any right now and only need a small amount for this frame, so I am going to use this water base acrylic from Joann's Craft. Be sure to work fast and don't keep brushing over the same spots to much, as the Hyde glue softens up from the paint it will start to clump if it keeps getting brushed. I did a second coat after the first had time to dry {my instructions said to wait an hour} to make sure that the white paint isn't too thine {opaque}. This will also help with the crackle effect to make some more intense cracks and cover up the super thin ones that I don't want showing. ~ Make sure it dries before moving on.


Once the paint has had time to fully dry, sand some personality into it. I like to sand corners, edges or anywhere that the paint would be missing from being handled over time.

After the paint dries your have a couple options to finish the crackle paint.
1. I am going to leave it the way it is.
2. To add another layer of antique to the project, take the rag you used when using the wood stain, make sure there is a little bit of stain on the rag and wipe it over the paint.
3. Add a sealant coat. I have used one that was brushed one or sprayed on from a can, like a clear acrylic {make sure it is not water based}.

My final project for this frame will follow in just a bit once I get it done

~Go Create

2.07.2013

Conversation Heart Cell Phone Cover Tutorial


Aaahhhh!!! I am so excited. I have my first Guest Blogger Tutorial to share with you today.

Adiel from It's Because I think Too Much has done our tutorial for us. Adiel is a twenty-something woman originally from the Salt Lake City area of Utah. She moved to the San Francisco Bay Area in 2009 for a job in social shopping--a perfect fit for such a social-media enthusiast and shopaholic!

She likes rings, pleats, polka dots, stripes, lace, mascara, and bright lip colors. She also loves to wear bold jewelry, pretty dresses, and sky-high heels. Quirky and whimsical accessories make her happy.

Materials Needed:
Old phone case
Acrylic paints in dove grey, pastel pink, pastel green, pastel yellow, and pastel purple
One sponge brush
At least two paint brushes in assorted sizes
Red letter stickers
Mod Podge Gloss

Step 1: Use the sponge brush to paint thin coats of dove grey all over the phone case. Let each coat dry before painting the next one. Continue until you reach the desired opacity. 

Step 2: Use the pink paint to paint a large heart in the center of the case. Using all pastel paints, randomly paint hearts all over the case. If you paint incomplete hearts along the edges, the effect will be better. 

Step 3: Use your stickers to apply your desired conversation heart phrase. I chose "Be Mine" but you can do any of the old standbys; "True Love" "Sweet Talk" "I'm Yours" etc...

Step 4: Use a large paint brush to coat the entire case with Mod Podge in two to three layers, letting each dry in between.

Voila! You've just made your own custom conversation heart case!


LinkWithin

Related Posts with Thumbnails