Showing posts with label DIY. Show all posts

11.25.2015

Fabric Scrap Twine

Who needs something to do with some of their fabric scraps?


Try making some fabric twine with it!!

There is a project I wanted to do for the girls room.


: : : : : : : : : MATERIALS/SUPPLIES : : : : : : : : :
Scrap Fabric

: : : : : : : : : TOOLS : : : : : : : : :
Cutting Mat

: : : : : : : : : INSTRUCTIONS : : : : : : : : :
I am sure there doesn't really need to be instructions here but I'll list a simple step by step so I can share a tip or two.


Cut your fabric scraps into 1" {inch} strips.

TIP: If the fabric I was using was super thin I cut wider strips. If the fabric was thick I cut thinner strips.


Take two strips, line the ends up and connect by tying the ends in a knot. 

TIP: When twisting the twine together it is easier if you can anchor the end of the fabric straps. This way it will hold steady as you twist the fabric strips. I used a clip and my pant leg when first starting until it was long enough to start wrapping around the spool.


Take each strip and twist in the same direction {I twist right} then take the strips and twist them, one over the other, in the other direction {left}.

TIP: I found it easier if I 'twisted' shorter sections together instead of trying to do longer sections.


When one of the fabric scraps reaches the end, simply overlap with the next piece of fabric, twist to hold together then continue winding the twine.

TIP: It works best if the fabric scraps are different lengths so they do not end and need to have new pieces added at the same time.


I did two sets of twine for different projects I have in mind. This was a really easy project and the end product is great. This fabric scrap twine can be used in so many ways like packaging gifts and using for art/craft projects.


This is a great activity to do after a long day, the kids are finally in bed and you just need a little something to do while you sit and binge watch your favorite series on Netflix. Seriously, it will take some time so be prepared.


2.10.2015

Valentine Garland or Photo Back Drop

Were you wondering what I did with those hearts from my previous tutorial on how to bring a cut file from Adobe Illustrator into Silhouette Studio {without having to pay for the software}?

Well today is your lucky day!

There isn't a mantel here and I'm pretty sure we will be moving this summer, either somewhere else in town or someplace new all together, depending on Paul's job. As a result I have not been too enthused to put all our photos and frames up, or our shelves.

So this simple, vertical garland, was a great way to add a little something for our Valentine Decor, is super easy and cheap.


MATERIALS/SUPPLIES
Cardstock to fit the size of your cutting machine {color(s) are up to you}

Floss Thread
Cut File {or Printable Pattern if you are going to cut them out by hand}

TOOLS
Silhouette Electric Cutter {or Exacto}

Scissors
Tape

INSTRUCTIONS
I am sure there doesn't really need to be instructions here but I'll list a simple step by step so I can share a tip or two.


Download the cut file and cut out the amount of hearts you need. 

By Hand: Print out PDF on the back side of the card stock, use the draft setting on your printer, this way if any lines still show they will be on the back of the heart. Use Exacto knife if you want the 3D hearts to flap open.

TIP: I cut out extra of both styles and colors because I was not entirely sure of the pattern I was going to put on the wall and did not want to have to go back and cut more. Just take any extra and use them to add love notes around the house for each other or place them on your childs bedroom door because they love stuff like that and will know you love them.


Decide on how far apart you want your vertical garlands {mine are 9" apart}. Use a small piece of clear tape to anchor the top and bottom of the floss. 
TIP: Just in case, I tied a knot at the top of the floss to keep it from sliding out of the tape.

Pull the floss snug but not tight, you don't want to pull it out from the tape at the top, and tape the end down.


Create a pattern or place hearts randomly along the floss on the wall {mine are about 17" apart as they go vertically up the wall}. Just roll a piece of tape and stick the heart to the wall and floss. I didn't end up using any 3D gold hearts but the red ones I have up turned out great.

BAM!!! Heart Attack Vertical Garland or Photo Back Drop


I would love to hear from you and see your projects. Leave a comment or #AlwaysCreate on your photos in Instagram. Find me on Instagram {@AlwaysCreate} and follow along for behind the scenes and fun little extras.

4.18.2014

Sharpie Marker Easter Plate

Do you remember me sharing on Instagram that I keep some designs that would normally be weeded out on transfer paper until I can use them in another project? Well, that is what I did with this bunny.


It is time to try the hot trend of a Sharpie Marker on a dollar store dish...again. I have tried this over and over again and all those claims of the dishes being dishwasher safe and the marker is permanent ~ well, that has never been the case for me. Just using dish soap and water has always taken the Sharpie marker off. Here goes another attempt.

I used the bunny silhouette saved from my Peter Cottontail burlap decor piece to create this plate. Originally I was going to use a couple different colors but ultimately decided to go with straight black on white. Remember, the dollar store dishes {or cheaper dishes from Wal-Mart and other stores} will work best because the glaze on them is thinner and will help in the baking process.


Use rubbing alcohol and a cotton ball, wipe down the dish to clean and remove any dust or oils.

Because this image used a pom-pom for the tail I had to improvise and find something to create a tail. Lady A loves stickers and we have a few of these sticker packets on hand for her. So I used one that  looked like it was the right size...and am pretty pleased with myself for my quick improvisation.

Now take the Sharpie marker and start dotting around the image.


Bake the dish in the oven by placing it on a cookie tray. With your dish in the oven set it to 425 degrees, once the temperature is reached bake it for 30 minutes. Let the oven cool and prop the oven door open with the dish still in it. 

Letting the dish warm up and cool down with the oven will help to keep the shock of the temperature changes from cracking the dishes. One of the perks is that the paper stickers on the bottom of the dishes were baked off so I didn't have to put any effort into removing them.


I love how this turned out! It will be fun to bring it out year after year and remind us of this time in our lives, as we wait for Lady #2 to join our family, as our lives change with Paul graduating and we get ready to move. We have a lot going on this Spring.


***MY IMAGE STAYED AFTER WASHING***

I attribute it mostly to the higher baking temperature, every tutorial I read said to bake at 350. It should also be noted by washing I mean with warm water, a washcloth and soap and no scrubbing ~ just lightly going over the surface to wash it off.

Tips from this project:
  • Rubbing alcohol will help the marker make better contact to the dish.
  • I called Sharpie and they do not recommend using dishes with this Sharpie technique for food or drink. The markers are not food safe according to the USDA.
  • An acrylic spray can be used to cover the dish and will help keep the images from fading or washing away {remember not to use the dish for food with an acrylic coating}.
Check out my Peter Cottontail  post for the Silhouette Studio file where you can find this bunny.

4.17.2014

Peter Cottontail Framed Easter Decor

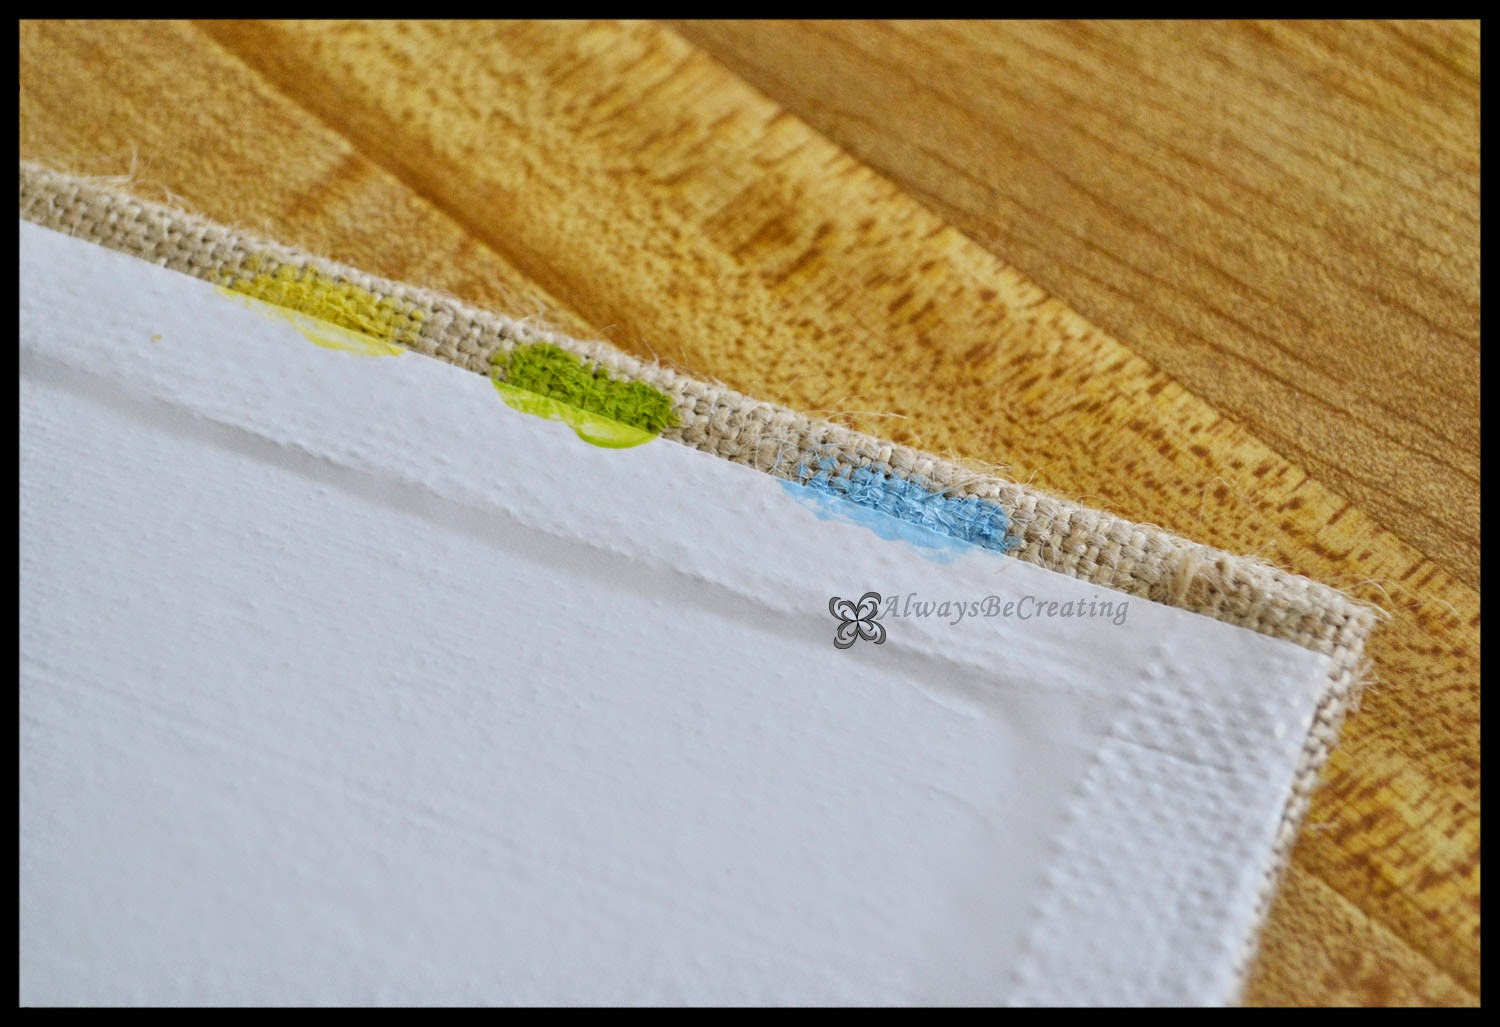
I loved using the burlap panels from Micheal's Craft Store when I created my Valentine sign I used them again to create some Easter Decor.

First I designed my vinyl cutout in Adobe Illustrator {I am more familiar with that program and feel like I can do more using it, including creating this cute bunny silhouette} then transferred it over to Silhouette Studio so I could cut the vinyl using my Portrait.

Here is what you will need to create this burlap sign:
Burlap panel
Paint in your choice of color {one or more}
Sponge brushes
Vinyl to cut & Transfer paper
Silhouette cutting machine
Silhouette Studio File {a .Studio3 file}
Frame
Hot Glue


First weed out the image from the vinyl after it has been cut. Then use transfer paper to set the vinyl onto your burlap panel. 

I tested a couple of colors on the back of the burlap to see which I liked best and decided to go with the blue for text and white for everything else.


The white paint is Liquitex and I love it because it is a thicker paint so not as many coats are needed. but it is more expensive so I only have it in a few colors. The pastel blue is Craft Smart, a normal satin acrylic paint. I ended up doing two coats of white because when the first coat dried too much of the burlap brown color was coming through. The blue I did 3-4 coats because it was being absorbed into the burlap more so I needed to try and make it thicker.

After the paint has time to fully dry remove the vinyl and be sure to add a pom-pom to Peter Cottontail.


Originally I was planning on spray painting the frame white but it has been raining non stop and since I have a toddler at home and am 39 weeks pregnant, spraying in the bathroom and just turning on the fan was not an option :)


I love the blue color but with the vinyl removed it does not stand out as much as I was hoping. I'll see how I like if over the next few days and if I need to, figure out some way to change it just a bit. 

Here are some of my tips and tricks for painting on burlap using a vinyl stencil:
  • The font used in this project is Harrington, it is one that was already on the computer.
  • When using transfer paper do not worry about sticking the vinyl image to firmly to the transfer paper. Since the burlap surface is not the best surface for sticking vinyl to, it will come up with the transfer paper instead of staying on the burlap.
  • Go over the edges of the vinyl with your finger. This will help create a bond to keep the paint from seeping under the vinyl.
  • Dab, do not brush. This helps keep the paint from going under the vinyl, keeps the woven texture of the burlap and gets paint into all the crevasses.
Other projects using burlap:
I Love You Because...

3.10.2014

Creating a Pellet Pillow

Have you seen the Yogibo? It is a great bean bag for the family room, bed room or reading nook. Lady A loves them and while our niece and nephew were out visiting us they got to play on some at our local library and Children's Museum. All the kids loved them and had a blast having Paul throw them into a pile of Yogibo bags.

It feels like we are bursting at the seems of our little apartment so there is no place for the giant bean bag but I still wanted to get Lady A one. I compromised a little bit and ended up buying a box of refill pellets. Do you see the size of that box? It's huge! So I'll be using the refill pellets for a couple of projects.


Here is the super simple project and one my daughter loves.

I took two pillowcases: one has Pooh Bear and a simple white one.

I measured out the two and made sure that the simple one was about 1/4"-1/2" smaller width than the Pooh Bear pillow case and that the length was a few inches shorter so that it would sit in the pillow case like a normal pillow.

Because I can be a bit of an A-type personality, I trimmed my white case so that it was nice and square. Then I stitched up all the sides leaving an opening about 3" wide to allow me to fill the case.

Since the pellets can be a bit of a challenge I decided to use a funnel made out of newspaper so that they would not get super static-y and fly away.

My husband helped me with this part, 4 hands were much better than 2 for this project. To help keep the newspaper funnel and pellet case from sliding apart I used two clips that I had laying around, this made it so much easier to fill the case.


Once you have the cas as full as you would like it, fold in the edges and top stitch to close the opening. Place in the themed pillowcase and viola!! Lady A loves her pillow. We got her a nice soft pillow for her bed but she still prefers to use this one at bedtime. I love when the things I make for others are loved!

Paul has even made good use out of the pillow a time or two!


These boxes were sold by weight, when I called no one could tell me the space or volume of the box so I ordered the larger box to be on the safe side. Since then I was able to suggest to the company to include the volume along with the weight and sure enough it was added that week. They had great customer service over the phone and at the shop we went to.

The 7lb box of pellets were A LOT more than I was planning on but that is ok because I have some great ideas for them....stay tuned!!!

4.24.2013

Bean Bag Bananza

Lady A went to nursery for the second time this past Sunday but for some reason she was not having it. In the middle of my Sunday School class {I teach the 9-10 year old kids} I could hear a scream from the hall, sure enough, I poke my head out and it was my kid, for everyone to hear.

After I was done teaching my class we both went back to the nursery for the last bit of church. There were a far number of kids and one of the choice tows were bean bags but there were not enough for all the kids. A benefit of sewing is that there are always scraps around so I decided we would make some more bean bags for the kids.

 16 Bags

 With your scraps cut out squares that are 5 1/2" x 5 1/2"

 With wrong sides together, stitch three and a half of the sides. I like to leave my opening in the middle of one side. For me, it makes it easier to stitch closed.

Take a random piece of paper to make a funnel. I found this was better than using a kitchen funnel because I could leave the opening wide enough to let the beans through.

Then I needed to take a photo and needed a third hand...and here came the bright idea, set the bag in a cup!! It works great to hold everything in place while pouring the beans in, lift the cone out and the job is done.
I tried a few different amounts and decided that 2/3 cup was the perfect amount, for me.

 Ya...I made 16 bean bags.

 Now simply pin the bag closed then sew it up and cut the thread.

Some for Lady A, some for the neighbors and the rest for the nursery kids.

Happy bean bag toss!!

4.16.2013

Antique Frame Technique

Have you seen those crackle paint frames? Have you wondered how to make one? It is super simple, let me walk you through it.

Keep in mind that each step is simple and goes pretty fast. The project as a whole takes time because the different layers need time to dry as each one is completed. I would also recommend trying it out on a scrap piece of wood {a 2 x 4 would be great} so you can understand how your stain, glue and paint all work together.


First gather all your stuff: Wooden frame, Wood Stain, Hyde Glue, Paper Cup {to mix}, Water Base Paint, Paint Brush {I used a sponge brush}, Sand Paper.

These first few steps are optional but I like to use them.
{Optional} If you need to, or choose to, sand the frame to smooth it out.


{Optional} Stain the frame according to the directions on the bottle. If it needs time to set, be sure to allow for that. Adding stain first adds a great contrast to show between the cracks of the pain. Sand down to add some personality to your frame.


In the small paper cup mix Hyde glue with water. For this project, since the frame is a smaller one, I mixed 3 parts glue and 1 part water. With the sponge brush add to frame {I added a second layer after the first dried}. ~ Make sure it dries before moving on.

*The less water mixed in with the Hyde glue the thicker the cracks will be. If thinner, more subtle cracks are what you are looking for mix more water into Hyde glue.
{I use a woodworkers Hyde glue for the crackle affect. There are a number of crackle paint products out now that you are sure to find at your local craft stores. I haven't tried any of them so, unfortunately, I don't have any insights as to how they all differ. But I can tell you I like using the Hyde glue for a couple reasons, fist being that this is what my dad used when he taught me the crackle paint technique so I am already familiar with this technique. The Hyde glue can also be used for my wood working projects.}


Normally I use left over {water base} paint from a can but I don't have any right now and only need a small amount for this frame, so I am going to use this water base acrylic from Joann's Craft. Be sure to work fast and don't keep brushing over the same spots to much, as the Hyde glue softens up from the paint it will start to clump if it keeps getting brushed. I did a second coat after the first had time to dry {my instructions said to wait an hour} to make sure that the white paint isn't too thine {opaque}. This will also help with the crackle effect to make some more intense cracks and cover up the super thin ones that I don't want showing. ~ Make sure it dries before moving on.


Once the paint has had time to fully dry, sand some personality into it. I like to sand corners, edges or anywhere that the paint would be missing from being handled over time.

After the paint dries your have a couple options to finish the crackle paint.
1. I am going to leave it the way it is.
2. To add another layer of antique to the project, take the rag you used when using the wood stain, make sure there is a little bit of stain on the rag and wipe it over the paint.
3. Add a sealant coat. I have used one that was brushed one or sprayed on from a can, like a clear acrylic {make sure it is not water based}.

My final project for this frame will follow in just a bit once I get it done

~Go Create

4.02.2013

Adding Grip to Socks

For Easter, one of the gifts Lady A got in her package from Grandma was a pack of socks. YEA!!

I know, it's not the most glamorous thing but they are needed. She isn't even 18 months old but she is in 2T+ for cloths and socks are no exception. But at this size/age, it is not the norm for socks to have the non-slip grip on them, you have to search them out and they cost a bit more. My little darling is not coordinated enough just yet to be on slippery surfaces without some help. She doesn't walk anywhere, it's always running, stopping is falling or running into the wall.


While I was looking for something to go with a separate project I am working on I came across some fabric puff paint, this stuff is actually called fabric writers. {Light Bulb} To help Lady A stay up on her feet I decided to add the non-slip grip myself. All you need are the socks and the puff paint.


When adding the puff paint to socks there are a couple of things to be careful of. For instance, no one likes it when there is a pebble in their shoe {or sock} so make sure not to create huge bumps on the bottoms by adding too much puff paint, but if you don't add enough it won't do any good. I would recommend using the puff paint on a scrap piece of fabric first so you can get a feel for how it works. Put the socks on their sides and add two strips to each side, the puff paint can go through the material if it is pressed in too hard so try to keep your hand steady and not push down when adding the puff paint. As the puff paint dries the 'puff' of it might go down some, this just depends on the type you will use, feel free to go back and add a little more.


Viola! Now she has a whole pack of non-slip socks. Life is good.

We spent last weekend testing them out and they worked great!

3.28.2013

Re-used Cans

Have I ever mentioned before that I love when packaging is re-usable?!?! So now I get two for one out of my purchase. With how often we have been moving around I love reusing what I can because when it is time to move again there is no feeling guilty about tossing out these things instead of packing them, and I don't feel like I am throwing away money.

I have my creative corner in the living room so it needs to be tidy and everything needs a place. This will help with keeping it tidy along with having a place for everything to go so that my daughters sticky little fingers don't get into everything.


Today I am sharing with you how I reused same cans from the kitchen to help get me organized.


Supplies Needed:
Any number of cans, any size {I used four various ones from the kitchen}
Cardstock
Mod Podge
Cutting Mat
Ruler
X-acto
Ruler
Hot Glue Gun & Glue Sticks
Embellishments {ribbon, buttons, twine, stamps, ink}


Measure the heigth of the can between the top and bottom rim, then around the canister to figure out the width, this will give you the size you need to cut the piece of cardstock to. For the two shorter ones my width was 12 5/8" {inches}, after cutting a 12" strip I cut another 1 1/2" strip to the same height.
*For things like stamping I suggest doing that before placing the cardstock around the can.

Take the wraps off the cans that will come off. Two of mine had the wraps printed right on the can so I couldn't remove them.
*This is why cardstock is a great option, with the thick cardstock, the label underneath it won't show through.

To start gluing the cardstock to the cans I placed them without any mod podge to make sure I had them lined up correctly. Then let one side up and apply mod podge to the back of the cardstock and place down. Now go along the rest of the cardstock, I did it in about 3" sections, applying mod podge then pressing it around the can.


I used some simple ribbon, twine and buttons to add a little bit of character to my cans.


The bow is pretty simple too. The ribbon I used is slightly thicker than 1/4". Cut a piece 5 1/2" long and another piece that was about 3x's as long as the width of the ribbon. Fold the two ends of the larger piece back into the center and use the hot glue to keep in place. Place the other piece, centered in the front, fold the top and bottom pieces around to the back and glue down. TaDa! a Bow!!

Most of the ribbon I used was left overs from other projects or even ribbons from gifts {specifically that wonderful green ribbon with flowers}.
*If you have ribbon that has been crunched simply use a flattening iron or curling iron to straighten it back out. Be careful to not clamp down too hard.
*For the yellow can with the green ribbon I applied mod podge to the back of the ribbon. This helped to make sure the flowers laid down flat and wouldn't lift up.
*I used the glue gun to hold the ends of the ribbons down securely.


Here are some of the items I used for this project:


LinkWithin

Related Posts with Thumbnails