Showing posts with label Christmas. Show all posts

12.19.2015

Silhouette Ornaments


Remember that tutorial I shared on how to create a silhouette using Adobe PhotoShop? Well, now we are going to create a project with it.


Be sure to look over my tutorial on how to use Photoshop to create a Silhouette. Don't forget that Amazon has a free 30 trial that comes with access to their Creative Cloud. I am over the moon excited about how these turned out!!!

Ok, that is enough. Now to show you how I did it.


: : : : : : : : Material/Supplies : : : : : : : : 
Glass/Plastic clear ornament bulbs {I used the flat ones, the image stays better in them}
Printed image

: : : : : : : : Tools : : : : : : : : 
X-acto Knife {or scissors}

: : : : : : : : How To : : : : : : : : 
Once you have your silhouette created, open up a blank page in PhotoShop, bring the image over onto the new page and scale to a size that will fit within the clear ornament, mine are 3" bulbs. Create duplicates if you need them.


Print out on normal printer paper. 


Cut out the silhouette image.

Here is how I did it:
Mark on the circle cutter for the size you want {3"}. Place on the silhouette image then spin the tray to make sure the image is centered in your 3" diameter.

NOTE: I only moved the cutting wheel once I had it marked to take a photo and show you how it looked. Normally I would not move it because lining it back up takes too much time.


Cut the circle around the silhouette leaving a small section at the top. Take the x-acto knife {or scissors} and cut a 'neck' on top.
TIP: This will help keep the paper from rolling around in the bulb and keep the image upright instead of sideways.


Roll the cut out around the handle of the x-acto knife {or pencil}.
NOTE: I kept the image facing out because once it is placed in a bulb it will keep a little bit of a curl.

Stick the handle of the x-acto knife {or pencil} in and help to unroll and flatten the paper.


Use an ornament hook or ribbon to hang the bulbs.


Sometimes simple really is easy and best. I love how these look on the tree, will treasure them forever and we are so excited to send some to grandparents as well.

I would love to hear from you and see your projects. Leave a comment or #AlwaysCreate on your photos in Instagram. Find me on Instagram {@AlwaysCreate} and follow along for behind the scenes.

Other Handmade Ornaments


Fast and simple ornaments


Pony Bed Ornaments

12.14.2015

Pony Bead Ornaments


Have you ever tried melting pony beads?

Well, it is fun, easy, the kids can join in on it and it doesn't cost a lot.

I know that the girls will want to play with the tree and all the decorations once we set it up so I decided to get a head of them and made some ornaments that would be ok for them to play with.


: : : : : : : : : MATERIALS/SUPPLIES : : : : : : : : :
9 mm Pony beads {check here for a huge range of colors}

: : : : : : : : : TOOLS : : : : : : : : :
Muffin tin {any metal baking sheet will work, even metal cookie cutters on a a metal sheet}
TIP: My tin was an old one I had. A second hand store would also be a great place to find a muffin tin.

: : : : : : : : : INSTRUCTIONS : : : : : : : : :
Preheat the oven to 400 degrees.


Place a single layer or beads in the bottom of the tin.


Bake for 25 minutes @ 400F.

Place the tin outside to cool. This will help keep the smell outside instead of in your kitchen and house.

When the beads are cooled, simply turn the muffin tin upside down, press on the back-center of each space where the beads are. They will simply pop out.

TIP: Depending on your oven you may not need to bake it that long, or you may need longer. Basically you need to bake it long enough that the bumps from the beads as the melt will smooth out.

TIP: Be sure to do this when you can open the windows and vent the space. Those beads stink when they are melting.

TIP: I have also heard of others who have baked it on the grill, outside, so it doesn't stink up the house.


Drill the holes where you would like.
String some ribbon in and Viola!!!!


My daughters love these little ornaments and so do I. We had some friends over to make some with us a few weeks ago and they were all so pleased with their own personal ornaments.

Other handmade ornaments


Rub-Ons


Silhouette Ornaments

12.08.2015

10 Minute Christmas Ornaments ~ No Personal Electric Cutter Needed


When it was just the two of us doing our undergrad, we always went to visit and stay with family for winter break. We were never "home" for the holidays so I never decorated. If I had, we wouldn't be able to enjoy any of it and when we go home after winter vacation I would have to dust it all and pack it back up.


One year while teaching some of the kids at our church, we had a Christmas party and made ornaments. It was a lot of fun and the kids were so creative. Years later I had parents tell me that their kids still had their ornaments and looked forward to hanging them on the tree every year.


That really gave me a boost to hear that the kids loved them so much.

These are super simple. Do not require any special equipment, and the kids can help.

: : : : : : : : : MATERIALS/SUPPLIES : : : : : : : : :
Plain Christmas bulbs {clear or colored}
Rub on stickers

: : : : : : : : : INSTRUCTIONS : : : : : : : : :
It is just as simple as cutting out the designs you want from the rub-ons sheet

Place it on your ornament .

Then rub the decal onto the ornament.


I like using the rub ons because they can have sharp and intricate designs without the fuss of needing to cut anything out and they stick so well.


You could try adding glitter or paint to the inside of clear bulbs as well.

This project is a great one to help add your own personality to your tree. The kids will also enjoy helping out. Share your project with me in Instagram. Be sure to tag me in your post and add #AlwaysCreate.


Other Handmade Ornaments

Pony Bead Ornaments


Silhouette Ornaments

12.07.2015

Simple ~ Inexpensive Christmas Bulb Wreath


I love the combination of silver and blues, especially when decorating for Christmas. One year after the Holiday Season I found the perfect bulbs to create a wreath. After stashing them with our Christmas decor it was finally time to put it all together for this year.


: : : : : : : : : MATERIALS/SUPPLIES : : : : : : : : :

Wire Hanger {ones that do not have the plastic coating on them are best}
Christmas Bulbs {the 3 packs of 24 would have been enough but the silver were on sale too and I got those so I could have more silver in my wreath}
Ribbon {optional}

: : : : : : : : : TOOLS : : : : : : : : :

{If using a hanger with a plastic coating}
Pliers
Box knife

: : : : : : : : : INSTRUCTIONS : : : : : : : : :


Pull the hanger into the shape of a circle, it doesn't need to be perfect. 

Untwist the neck of the hanger. Since my hangers were covered in plastic I needed to use the pliers and box cutter to help me take off the plastic and unwind the neck.


{EXTRA STEP: When I tried to slide the bulbs onto the hanger I found that, with the plastic coating, it was too thick. So I simply sliced off the plastic coating then pulled the rest of it off. No big deal, it only added an extra couple of minutes.

When we were younger, my dad would bring home extra wire from job sites, we would strip it then my dad would take it in to recycle.}


Now just start stringing the bulbs on using loops on top of the bulbs.

TIP: As my daughter tried to help me move the wreathe she was pulling on some of the bulbs and they came apart from their tops looped onto the hanger. It was impossible to get them back on. I would suggest a small drop or two  wre the neck of the bulb and the top piece meet to hold it a little more firmly. Once all the bulbs are on, the drops of glue won't be seen. 

All that is left once you have your bulbs on is to twist the top of the hanger closed.

Go ahead and use the ribbon to tie a bow around the neck of the hanger, this will help to hide it as well. {I do not have a ribbon on hand and since there are no craft or hobby stores around, I will have to wait until we make it out next}


The great thing about doing this project digitally is that you can use the silhouette in so many different ways. Share your silhouette project with me in Instagram. Be sure to tag me in your post and add #AlwaysCreate.

11.29.2015

11 Advent Calendars that can be Made Up in A Night

Ok, I am a bit late to the party so I need a quick, easy advent calendar that I can make up in an evening. The girls are still really young so we need something simple, not too flashy, or they will just want to do it all in one day.


On my quest to start our own family traditions and find some ideas for simple advent calendars, I put together a quick list with some of the ones I found.

Now, keep in mind that a few of these could look pretty involved BUT if you tweak them a little, and put your own spin on them you could get fun and simple all in one. That is the best part of doing a project yourself, making it your own!

Kraft Paper
Sewn Treat Bags by PeppermintPlum

Another Kraft Paper calendar by CanadianLiving

How many toilet paper rolls do you have on hand?
{You could also use cardstock to roll up and make some tubes}


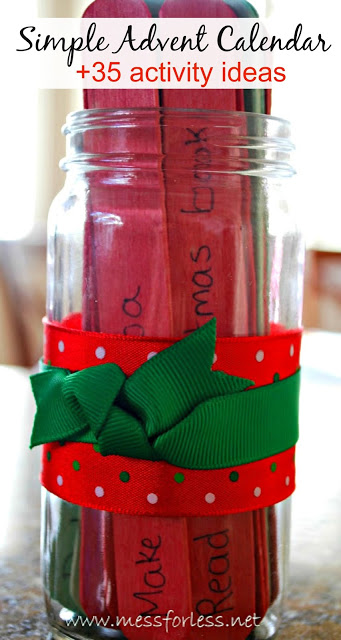
Pick and Choose by MessForLess

Printables
I love the simplicity with the presentation of this one by MaileBelles
You could make it even easier by placing hand written cards in the envelopes


Christmas Story Printable by RedBird-Blue

Wall Chart by ThePaintedHive

**********
I haven't ever seen anyone else use acetone to transfer an image before but I can tell you it really does work
Here is the process.
Here is my project.
**********

Vintage Advent Calendar by EllaClaireInspired
This one would be really cute even without the embellishments

I hope you found something to inspire you. Remember, it doesn't have to be elaborate to be fun. Just make it your own!

LinkWithin

Related Posts with Thumbnails