Showing posts with label Family. Show all posts

1.02.2016

Yearly Savings Schedule

With the New Year comes new goals. One for us as a family, along with using our Budget Binder to help us to stay on track and pay off debt, is to start saving money too.

To help with this, and so it would not seem like such a big task I came up with a weekly chart to help save a little at a time instead of trying to do larger amounts every once in awhile. I actually saw this idea float around FaceBook a year or so ago and am excited to try it now.

A savings plan would be great for the kids to get involved in too. At a young age it can teach them discipline and self confidence.
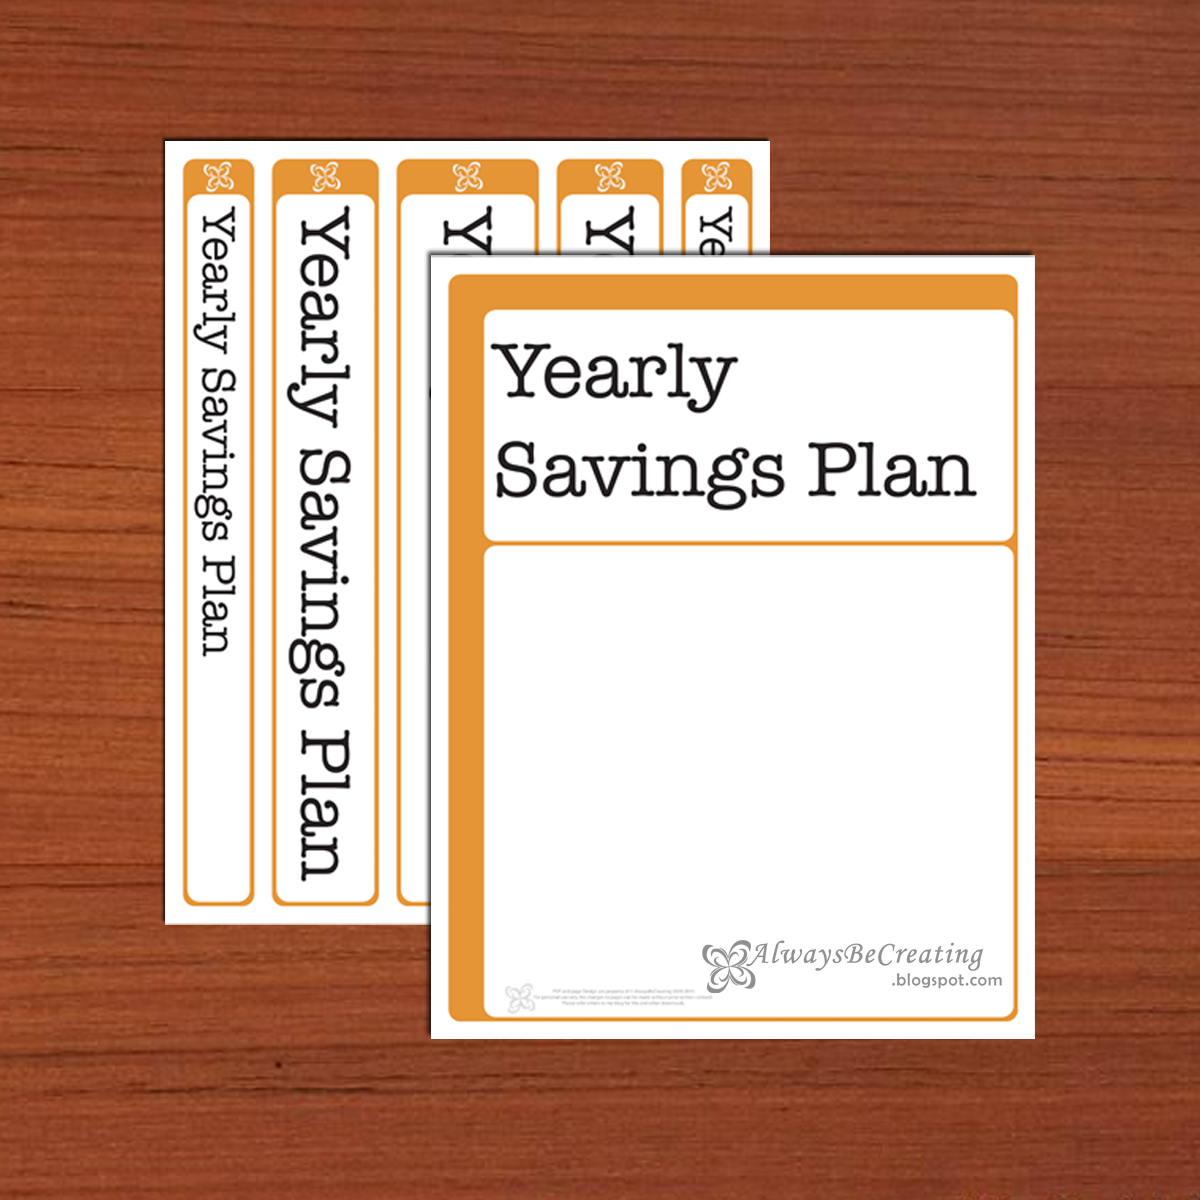

To make your own Yearly Savings Plan you will need the same items used for the Budget Binder, at the very least a binder and these free printables. You can also use dividers, page protectors, laminator {yes I'm a dork and love mine} with pouches, hole punch and pens.


The pages included in the Yearly Savings Plan are:
Binder Cover and Spin Slip {in 3 different widths}
3 Black and White pages
4 Colored pages


The first plan starts at $52 a week and every week decreases by $1. Total = $1378
Next, $25 each week {orange chart only}. Total = $1300
One for the kids that starts at $26 and decreases by $0.50 each week. Total = $689
Finally a blank sheet.


Pick a savings plan that works for you {in our case we are doing one for each of our girls as well}. Then decide on which day of the week you will put that money aside. There is a spot on the top to fill in a name on the charts, you know, incase you are doing more than one so you can keep them all straight. Follow the chart to create a savings for the end of the year. Right now we will be using ours to help pay of those yearly expenses that come up once a year or every few months.


If there is a certain amount you are trying to reach after a year of saving, use the blank form. For example, let's say you want to save $1500 by the end of the year. 

Simply take $1500/52 weeks = $28.846..... per week.

Fill in the cart and set aside $29 each week and that will be $1508 for the year.

I sure hope this helps you in coming up with a savings plan that will work best for you!


What are some of your goals this year? We seem to be focusing on financial and physical ones this year, yes I even got my husband to commit to it. Here is to a great 2016, I hope you achieve all you set out to do.

Here are some of my other binder printables


Check out our Moving Binder

Here is my Checklist for Weathering the Storms 

12.24.2015

Our Budget Binder

Since being married we have ALWAYS been college students. We both did our undergrad at Utah State University then Paul was accepted to UConn as a lighting design Grad student. He was able to get his tuition paid but fees and living expenses were up to us. As a new mom and in a new area with no contacts and babysitters we decided to have me stay at home.


After doing all that we could we still needed to take out some student loans. We have heard from others about what they owe, and oh my goodness! People it's OK to take out loans, when we use them as a tool to help us move forward, just remember to be smart. You WILL have to pay those back and they will be with you like a nasty cough until they are paid off.

Now that Paul has been working full time this last year and a half, it has been an eye opener. We can not just go take out $1-2K in loans anymore when we need it. This has really made me wish I had done better about our budget during school but grateful we were pretty frugal during that time too.


As we are trying to pay off debt and not go into more debt I have come to appreciate having a budget for the family and how much it can really help us. When we first moved to KY we met some friends {OK, basically I looked them up from our church and said we were moving to the area and when we were planning on being there} and they shared a website they use to track their budget. We really liked the idea behind it but it was a bit too much for us. And for some reason it kept counting the money from one of our accounts twice so the numbers were always off.

There are also some things I do better with when I can write it down and see it right in front of me. So I came up with a budget binder!!!

I remember growing up seeing my mom sitting at the kitchen table with their processed checks, bank statements, CC bills, etc and balancing their accounts. I really love math and numbers, in college I took extra math classes for fun, and so it was great to see everything balance out by the time my mom had gotten done. It made my little OCD heart happy! 

Now, I am no professional by any means, but I have put together these printable sheets to create our Budget Binder. They have been great!!!! Over the last two months we have been using this to keep track of our budget and I have made a couple of tweaks to the pages. If you have any suggestions please feel free to leave a comment, I would love to hear from you.


To make your own budget binder you will need at the very least a binder and these free printables. You can also use dividers, page protectors, laminator {yes I'm a dork and love mine} with pouches, hole punch and pens {you could even do colored ones to go one step further and color code your spending to help you see where your money is going}.


Here are the pages I have available with this free printable:
Binder cover and spine slip
Year at a Glance
Perpetual Yearly Spending
Perpetual Monthly Spending
Monthly Spending
Debt Tracker
Savings Tracker


We filled in the perpetual monthly and yearly expenses then laminated the sheets. This way as I continually handle them and look at them through the year, they won't get ruined. This is also great to keep in the back cover of the binder so I can take a quick glance at it when I need to see which bills are coming up.

Now, once a weekend Paul and I sit down and look over the accounts, making sure everything adds up correctly. Using a budget has helped us a lot, mostly in being able to keep from adding to our debt while also being able to start paying it off. Yippy! One step closer to financial freedom.

There it is. A few simple sheets, a little bit of discipline and we are getting our budget in order.

Start a Yearly Savings Plan with this printable

Check out our Moving Binder

Here is my Checklist for Weathering the Storms

I was FEATURED!!!

I was featured at

12.07.2015

Simple ~ Inexpensive Christmas Bulb Wreath


I love the combination of silver and blues, especially when decorating for Christmas. One year after the Holiday Season I found the perfect bulbs to create a wreath. After stashing them with our Christmas decor it was finally time to put it all together for this year.


: : : : : : : : : MATERIALS/SUPPLIES : : : : : : : : :

Wire Hanger {ones that do not have the plastic coating on them are best}
Christmas Bulbs {the 3 packs of 24 would have been enough but the silver were on sale too and I got those so I could have more silver in my wreath}
Ribbon {optional}

: : : : : : : : : TOOLS : : : : : : : : :

{If using a hanger with a plastic coating}
Pliers
Box knife

: : : : : : : : : INSTRUCTIONS : : : : : : : : :


Pull the hanger into the shape of a circle, it doesn't need to be perfect. 

Untwist the neck of the hanger. Since my hangers were covered in plastic I needed to use the pliers and box cutter to help me take off the plastic and unwind the neck.


{EXTRA STEP: When I tried to slide the bulbs onto the hanger I found that, with the plastic coating, it was too thick. So I simply sliced off the plastic coating then pulled the rest of it off. No big deal, it only added an extra couple of minutes.

When we were younger, my dad would bring home extra wire from job sites, we would strip it then my dad would take it in to recycle.}


Now just start stringing the bulbs on using loops on top of the bulbs.

TIP: As my daughter tried to help me move the wreathe she was pulling on some of the bulbs and they came apart from their tops looped onto the hanger. It was impossible to get them back on. I would suggest a small drop or two  wre the neck of the bulb and the top piece meet to hold it a little more firmly. Once all the bulbs are on, the drops of glue won't be seen. 

All that is left once you have your bulbs on is to twist the top of the hanger closed.

Go ahead and use the ribbon to tie a bow around the neck of the hanger, this will help to hide it as well. {I do not have a ribbon on hand and since there are no craft or hobby stores around, I will have to wait until we make it out next}


The great thing about doing this project digitally is that you can use the silhouette in so many different ways. Share your silhouette project with me in Instagram. Be sure to tag me in your post and add #AlwaysCreate.

11.29.2015

11 Advent Calendars that can be Made Up in A Night

Ok, I am a bit late to the party so I need a quick, easy advent calendar that I can make up in an evening. The girls are still really young so we need something simple, not too flashy, or they will just want to do it all in one day.


On my quest to start our own family traditions and find some ideas for simple advent calendars, I put together a quick list with some of the ones I found.

Now, keep in mind that a few of these could look pretty involved BUT if you tweak them a little, and put your own spin on them you could get fun and simple all in one. That is the best part of doing a project yourself, making it your own!

Kraft Paper
Sewn Treat Bags by PeppermintPlum

Another Kraft Paper calendar by CanadianLiving

How many toilet paper rolls do you have on hand?
{You could also use cardstock to roll up and make some tubes}


Pick and Choose by MessForLess

Printables
I love the simplicity with the presentation of this one by MaileBelles
You could make it even easier by placing hand written cards in the envelopes


Christmas Story Printable by RedBird-Blue

Wall Chart by ThePaintedHive

**********
I haven't ever seen anyone else use acetone to transfer an image before but I can tell you it really does work
Here is the process.
Here is my project.
**********

Vintage Advent Calendar by EllaClaireInspired
This one would be really cute even without the embellishments

I hope you found something to inspire you. Remember, it doesn't have to be elaborate to be fun. Just make it your own!

7.14.2015

Prime Day 2015

Ok, it has been some time since I have posted but this is {hopefully} to great to pass up. So I had to share.


Have you heard that Amazon is having a Prime day and they are promising more sales than Black Friday. You have to be a prime member to take advantage of this so go here to sign up for your free 30 day trial.

Prime Day: More Deals Than Black Friday

Here is all the information they have listed "Prime Day is a one-day shopping event on July 15, 2015, with more deals than Black Friday. Prime members can shop exclusive deals from electronics, toys, video games, movies, clothing, patio, lawn and garden, sports and outdoor items and more."

Here are just some of the benefits of a Prime member ship:

1.02.2015

New Years Traditions

With the New Year comes new traditions. Now that Lady A is a bit older and able to participate a little more in family activities we have had a lot of fun coming up with our own family traditions, especially since we live away from the rest of our family and won't always be able to make it out for the big events and holidays.

I'm not much of one for New Years Eve events, trying to keep my toddler up until midnight does not sound fun right now. She would be so tired and fussy by the time midnight came and the following day we would all still be paying for it.

But it is still a good reason to celebrate so for now we will celebrate on New Years Day!

We are new to Kentucky, we got here the weekend before the college semester started in August. While the winter has been pretty mild compared to what we are used to {we are from Utah and spent the last three years in Connecticut for Grad School} but we are told that the cold comes mostly in January. Here is my mug and saying for the year.


We all can use a little pep talk every once in a while.


Lady A joined in and created her own as well!
We need to encourage those little creative minds


The back detail


Paul helped her a little bit.
She wanted to use the mug I had done a little trial on. The gold dots were "oh, pretty!"

SUPPLIES
Paint Pens / Sharpie Markers
Cheap White Mug {I got mine from Wal-mart}
Vinyl {optional}
Silhouette Portrait {optional}
Saying, Quote, Shapes etc. {optional}

INSTRUCTIONS
I do not care for my handwriting on the mugs, it just never turns out the way I want. Instead I busted out my Silhouette Portrait and quickly cut out a little saying. 


Clean the surface you are going to be placing your design. I used a cotton ball and rubbing alcohol and went over the area once to wipe away any dirt and oils on the mugs.

Place your stickers, shapes, or vinyl where you want it. Now so to town with your paint pens and markers to create your one and only mug.


I used CraftSmart paint pens. I had more colors on hand with the markers so Lady A decided to use them.

Bake the dish int eh oven by placing it on a cookie tray. With your mug in the oven set it to 425 degrees, once the temperature is reached bake it for 30 minutes. Prop the door open, turn the oven off and let it your oven cool with your mug still in it.


A close up of the back detail.


I love how they turned out. Lady A is pretty pleased with herself too! Now that she is getting older and wants to join me in my creative activities I am so excited to see her creative personality emerge.

TIPS: 
I took two days to do mine because Lady A wanted me to wait so that she could finish her master piece before we placed them in the oven. When using a paint pen to fill in or around a letters and shapes, I would recommend taking them vinyl off before the paint has time to dry too much. Taking it off in the morning after the paint had time to dry and get tacky pulled up some of the paint from my letters so they don't look as smooth as I would like.

On the dishes I have made so far I have found that the Paint Pen stays great to wash in the dishwasher on the top shelf. Sharpie marker is best washed by hand. Do Not scrub! Use a soft washcloth and mild soap


Here is another Sharpie marker project with different tips and tricks.


I would love to hear from you and see your projects. Leave a comment or #AlwaysCreate on your photos. Find me on Instagram {@AlwaysCreate} and follow along for behind the scenes and fun little extras.

3.31.2014

2014 Goals Update

It is time to do a quarterly update of my goals for this year. I have been reading over them and thinking to myself, 'Wow, I had no idea what this third trimester was going to hold.'

Lets just get right into it.

One: Enjoy the last trimester of this pregnancy
Well, that was ambitious of me! My body feels like I am falling apart and my left leg has started to drag. Isn't pregnancy glamorous! I have read some from others about how much they love these nine months, to watch their body change, bond with the baby, on and on. I feel bad every time I read one of these because I can not wait for it to be over. I would rather sleep in my own bed, instead of the recliner, and be sleep deprived, changing diapers then be pregnant for another 3 1/2 weeks. I was, however, able to make an afghan for Lady #2 and am super excited to wrap her up in it. Another thing I have loved to think about is that Lady A will soon be a big sister and that she will have a sister. My sister and I could not be more different but I love that I had her to talk to while we were growing up and now that we are older our bond is stronger. I recently saw a quote that went something like 'Because I have a sister I will always have a friend.' I could not agree more and am so excited for our little girls to have each other.

Two: Develop a routine
We have a pretty good routine going. We live in a small community but there are a lot of families and a lot of activities centered around toddlers and family. There is the library, we live between two so we are able to visit both some times, the community center, a group of women from church and a day to do grocery shopping when dad can come with us in the mornings. Right now we are really enjoying having so many places to go so Lady A can play with other kids and I can supervise. The thought of getting down on the floor makes my hips shiver in pain, so this schedule is a win-win!!

Three: Date Nights with Paul
I feel like I am eating my words a little on this one. I really wanted to start doing a regular date night and you know from my original post that Paul's idea of date night is renting a movie and half of the time falling asleep on the sofa. Well, that has now turned into my date night idea during this third trimester. In February when his show opened I took the time to get ready, the whole nine yards, by the time I was done I was worn out and ready for bed, not to go out for hours and mingle. I am glad I did, his design was awesome and it was great to visit with the cast and crew.

We will continue to work on date night but for now, I am feeling fine with a movie night for our dates.

Four: Be mostly packed and ready to move before Little Sister comes in April
Maybe I was feeling a little ambitious when I wrote out my goals for this year. With Lady A the third trimester was the best. I finally got over the morning sickness and did not need any pills to help. That has not been the case this time. I have slowly been packing up boxes but am not as far as I would like to be since I can not lift too much, bend or hunch and run out of energy so fast. Once I get a box packed it sits right where I had it until Paul has time to move them for us.

Five: Family History
This one is mostly for myself right now. I love looking into where my family came from and it has been even more meaningful now that I have two girls to pass it all onto. I have a family member who has a bit of a rough past {we have have ancestors or even family now like that} but I am finding that the older generations do not like to talk about those things and a lot is lost when people pass away. Once I was putting together a video for my Grandpa and Grandma's 80th birthdays, they are just weeks apart, and so I needed to get photos. My Grandpa is a private man and I really thought I had seen all the photos he had {there were about 12} but I felt like I should ask him again. I can not stress to you how nervous I was because I did not want to offend him but I live by my moms motto 'If you never ask, you'll never know.!' Turns out he had an old chest full of photos and not just photos, there were letters, other papers and a hand written journal from my dads Great-Grandma. My dad Loved his Gram and was so excited to see and read a journal written in her own hand. 

I have slowly been keeping up on my family history and sharing it with those in my family who are interested. It will be a few months until I can fully spread out and delve deep into it but for now I am happy with the progress I have made this year in organizing everything and getting copies to those who want it.

Review
It looks like I have some work to do still and luckily there are nine months left in this year. These next few months are going to be super busy with all of the changes coming up for our family but I am sure I can keep up on my personal goals, this could only help this time go smoothly. Right!?!

3.17.2014

Leprechaun Popcorn Treat

My favorite treat as of late is popcorn, sweet or salty, it does not matter. A little something to snack on while working on chores or watching a movie, it is just perfect.

Today I am sharing our Leprechaun Popcorn. It requires three ingredients but you can add anything you would like to help sweeten the pot.

Yum!
Items needed:
Cookie sheet
Tin foil {heavy duty would be best}
Cooking spray or butter
Small pot
Whisk
12 Cups popped popcorn {about 1/2 unpopped}
3 oz Lime Jell-o
14 oz can Sweetened Condensed Milk
1/2 bag of Mini M&M's

Place the tin foil on the cookie sheet being sure to cover the entire sheet and even fold over the edges. This will help keep the tin foil in place. Spray the entire sheet with a generous amount of cooking spray. You will be thankful you did later on when it is time to remove the popcorn. Trust me!

Pop the popcorn. Measure out 12 Cups making sure to leave behind any kernels that did not pop. No body likes to bit into a yummy treat and chomp down on a kernel. Ouch.

Place on the cookie sheet, put it in the oven and heat to 300˚. This will help keep the popcorn warm so when it is time to add the Jell-o mix, it will spread easier over the warm popcorn.

Mix the Jell-o and sweetened condensed milk on medium heat 4-5 minutes, stirring with a whisk. Stir the whole time because it has a tendency to burn on the bottom. My mix never boils but it does become a little thicker as it heats on the stove.

Remove the cookie sheet of popcorn from the oven and pour the Jell-o mix over it. Use a plastic spatula {I even put some cooking spray on that to help keep the mixture from sticking} to evenly mix. 

Bake at 300˚ for 20 minutes, stirring ever 5 minutes. This helps to keep the stuff on top from burning since it will all be rotated. Also make sure that you do not have high peaks of popcorn from stirring, those will burn pretty fast.

Remove from the oven after 20 minutes and let it cool. After it has cooled add the mini M&M's or bite size candy of choice. Then break apart into individual servings or place the whole thing in a bowl and enjoy! Store extra in an air tight container.

A couple for movie night

Tip: If you want a little salty mixed in with your treat you could try using lightly butter and salted microwave popcorn.

Hint: I like my Leprechaun Popcorn to be a bit chewy so cooking at a medium temperature and baking for only 20 minutes will help keep it soft. If you would like it to be more crunchy try cooking the Jell-o mix at a little higher temp or baking it an extra five minutes.

Some for the neighbors

Download a pdf of the recipe here.

Do not forget to enter the Spring Birthday Wish Giveaway. Ends midnight {est} the March 20th.

LinkWithin

Related Posts with Thumbnails